This update mainly adds a cockpit for the VB-37 Astore, and also two new single missions.
On of these (Can of Worms) is kinda “experimental”, not that it’s unfinished, but rather that we’re experimenting some ideas. Both of them deepen a little bit the backtround of BOMB, which is always cool 🙂
We remind that the game is available on Steam, but it’s now available on Humblestore too !
Now we have a mission with multiple objectives, asking the player to destroy both vehicles and aircraft. But this is still harsh. We’ll see in this tutorial how to add more staging to make the mission more interesting.
First, let’s imagine the mission is about destroying an howitzer that is bombing the airbase.
As the howitzers in BOMB are not actually firing anything, we need to add some fake explosions around the airfield.
To do so, there is a special object type called “Explosion Zone”, which is created by script.
To create it, simply add these lines at the end of the “onInit()” function
self.explosionZone =createExplosionZone()

self.explosionZone:setPosition(self.gameManager:getLevel():getObject("player_spawn"):getPosition())

self.explosionZone:setZoneSize(Vector3(500,0,500))

self.explosionZone:setFrequency(2)

self.explosionZone:setComposerType("P_GROUND_EXPLOSION")

self.explosionZone:setSound("SFX_EXPLOSION_")

self.explosionZone:start()
This will create an explosion zone, located around the player_spawn, with a size of 500 meters x 500 meters, making an explosion every 2 seconds.
The kind of particle effect used is “P_GROUND_EXPLOSION” and the sound set used is “SFX_EXPLOSION_“.
In the very first mission of the game “Spam”, we used this to create the flak explosions when approaching the village, but with different particles and sound:
self.explosionZone:setComposerType("P_FLAK_EXPLOSION")

self.explosionZone:setSound("SFX_FLAK_")
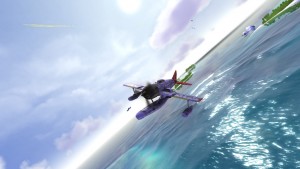
Imagine now you want to use this on water, IE if you want to make a mission featuring a ship attacked by an howitzer, then you could do this:
self.explosionZone:setComposerType("P_EXPLOSION_WATER")

self.explosionZone:setSound("SFX_EXPLOSION_")
Don’t worry for player safety though, the explosions created with ExplosionZones are harmless.
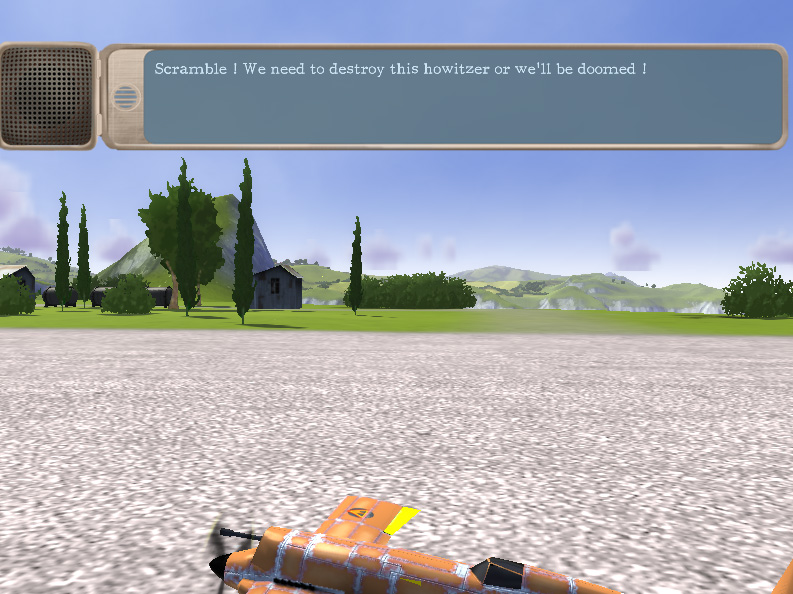
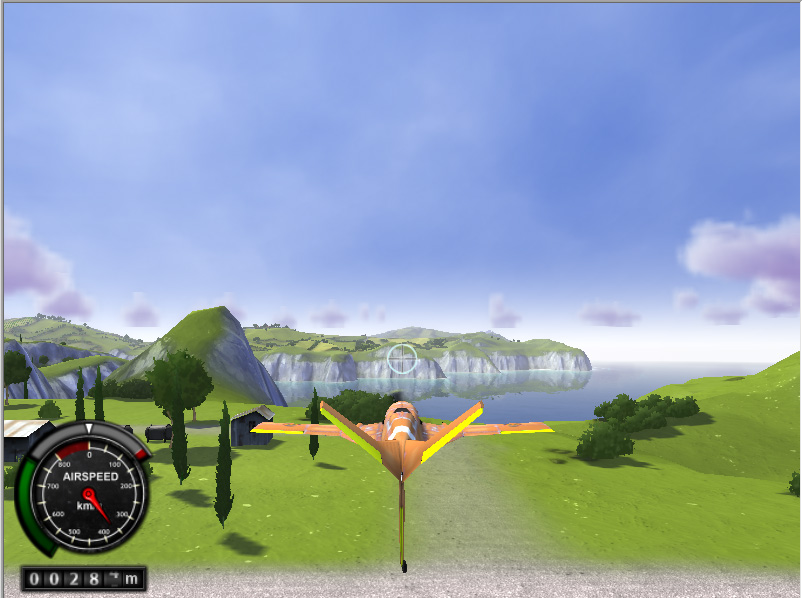
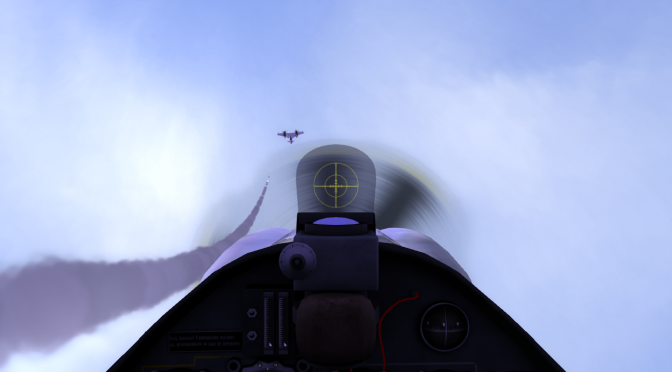
Explosions showing the bombing of the airfield by the howitzer.
As the explosions are related to the howitzer, we need to disable them as soon as it is destroyed. Go back to the “onObjectDestroyed” function and change it’s content to :
function Sample_mission_3:onObjectDestroyed(object)

if(object:getName() == "howitzer_0") then

self.missionManager:getFlight("enemy_flight_0"):setFrozen(false)

 self.explosionZone:stop()

end

end
Now, the explosions will be disabled when howitzer is destroyed.
Adding dialogs
Things are getting better, but we still need to add some dialog to give more identity to the mission.
Go to the “onInit” function
Add this line at the end :
self.HUD:addRadioCommunication("unknown","","Scramble ! We need to destroy this howitzer or we'll be doomed !",nil)
The first parameter is the name of the character currently speaking. The second one is the “mood”, here left blank, the third parameter is the dialog itself, and the last one is the object the camera will look at (using a flyby camera if the object is moving) during this dialog.
If left to nil, the last parameter won’t change the camera at all, leaving it to the default in game camera.
This will change the camera so that it will look at the object 2 from the object1.
You can use nil as the first object to look automatically from the player aircraft. If both objects are set to nil, this will use the default in game camera.
The object parameter is still the object we’d like to look at, but now, if the targeted object is an aircraft having a cockpit, you’ll have the choice to force the point of view to cockpit or external, by setting the “external” parameter to true or false.
The two last parameters are the angles (in degres ) from which we’ll look at the object.
Let’s use the second function in this mission.
Replace the line we’ve added before by this one:
self.HUD:addRadioCommunication("unknown","","Scramble ! We need to destroy this howitzer or we'll be doomed !",nil,self.gameManager:getLevel():getObject("howitzer_0"))
Now, the camera will look from the player aircraft to the howitzer position.
Also add this one to introduce the pilot we’re playing in this mission:
self.HUD:addRadioCommunication("PILOT2","","Consider it done !",nil)
Then we need to add a dialog when enemy flight is awaken to warn the player about this new threat.
Go again to the “onObjectDestroyed” function, and change it to:
function Sample_mission_3:onObjectDestroyed(object)

if(object:getName() == "howitzer_0") then

self.missionManager:getFlight("enemy_flight_0"):setFrozen(false)

self.explosionZone:stop()

local leader = self.missionManager:getFlight("enemy_flight_0"):getLeaderAircraft()

 self.HUD:addRadioCommunication("PILOT1","","How allowed you to destroy our guns ? You'll pay for that !",nil,leader)

 self.HUD:addRadioCommunication("PILOT2","","How original...",nil)

end

end
This will introduce the enemies as they arrive in the arena.
Mission ending.
Once every vehicle and aircraft has been destroyed, we can consider the mission as completed, and we need to tell it to the player.
As you may have found it by yourself, we need to add some code in the “onObjectiveCompleted()” function.
Add the following lines to the function body:
if(self.playerInterceptObjective~= nil and id == self.playerInterceptObjective:getId()) then

self.HUD:showMissionSuccess(true)

GameMenuObject.missionSuccess = true

end
This will display the “objective completed” text and enable the “next” button in the in game menu (the one you can access by pressing escape)
Bonus: landing objective
Bonus: You can also add a final “Return To Base” objective for players who’d want to land at the mission end, and automatically quit the mission when successfully landing.
First, we need to add the RTBObjective. Change the last piece of code to this:
if(self.playerInterceptObjective~= nil and id == self.playerInterceptObjective:getId()) then

self.HUD:showMissionSuccess(true)

GameMenuObject.missionSuccess = true

self.RTBObjective = self.missionManager:addRTBObjective(1,self.gameManager:getLevel():getObject("player_spawn"))

 self.playerFlight:setObjective(self.RTBObjective)

end
The new lines create a RTB objective telling the player to land near the player_spawn (located here on the runway, but you could also create another waypoint object located close to the hangars) .
Now, we need to track the completion of this objective to start a fade out.
In the OnObjectiveCompleted function, add this block: if(self.RTBObjective ~=nil and id == self.RTBObjective:getId()) then PostProcessManager.getSingleton():fadeOut(5, ColourValue(0,0,0,0))
self.endFadeStarted = true
self.endTimer = 0
end The highlighted line will ask the game to start a fade to black lasting 5 seconds
The default script will automatically quit the level 5 seconds after the fade has been started. The piece of code doing this is located in the [MissionName]:update() function, you can have a look if you want to but it’s not necessary. Et voilà !
Open the “Project” menu and click on “Add new mission”
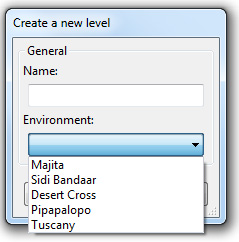
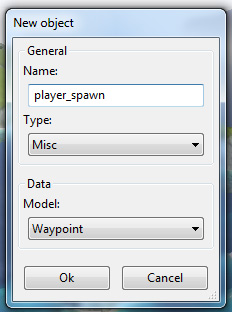
This window will popup:
The mission name should be in the form The_coolest_mission_ever, with each word separated by an underscore.
It will be displayed in BOMB missions menu with the following name: “The coolest mission ever”
Choose the environment in which you want to create the mission. For this tutorial, choose Tuscany.
Click ok. This will create and open the new mission in the editor. This may take some time.
The player spawn
The first thing to decide for a new mission is where to spawn the player’s plane. To do it, you need to instruct the engine with a world position to use. A convenient way to obtain such 3D coordinates, is to get it from a waypoint object.
You can add such an object either by clicking Project/Add a new mission object or by pressing Control+Alt+N
This window will be displayed:
Choose whatever name you want, we name it “player_spawn”.
As a type, select Misc, and as Data, select Waypoint.
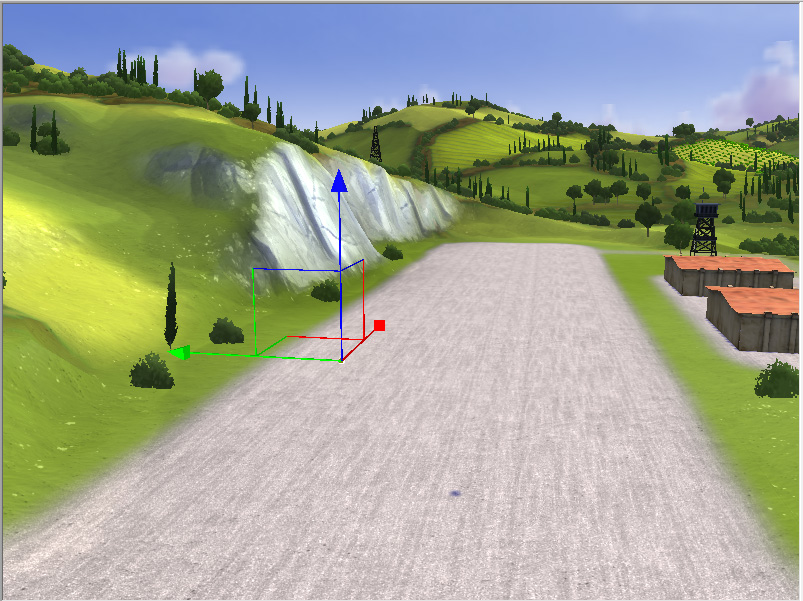
Reminder: You can select it by either clicking on it or selecting it in the left side tree view.Once selected, you can move by pressing T or rotate it by pressing Y.
Navigate through the scene and choose a nice location. In this mission we’ll spawn over one of the two airfields of the map, the one located near (X=-8200, Z=-595).
Remember you can see your current position in world in the bottom info bar !
You can teleport a selected object on the terrain by maintaining alt when you left click.
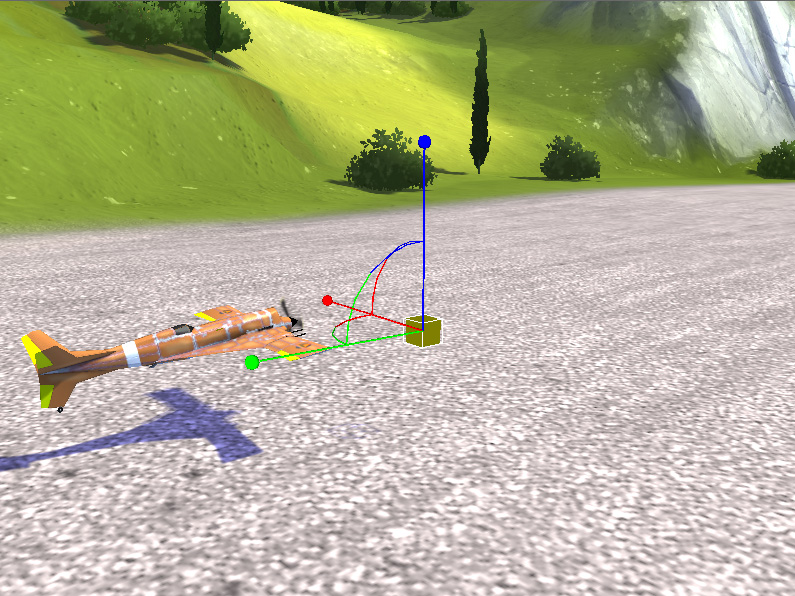
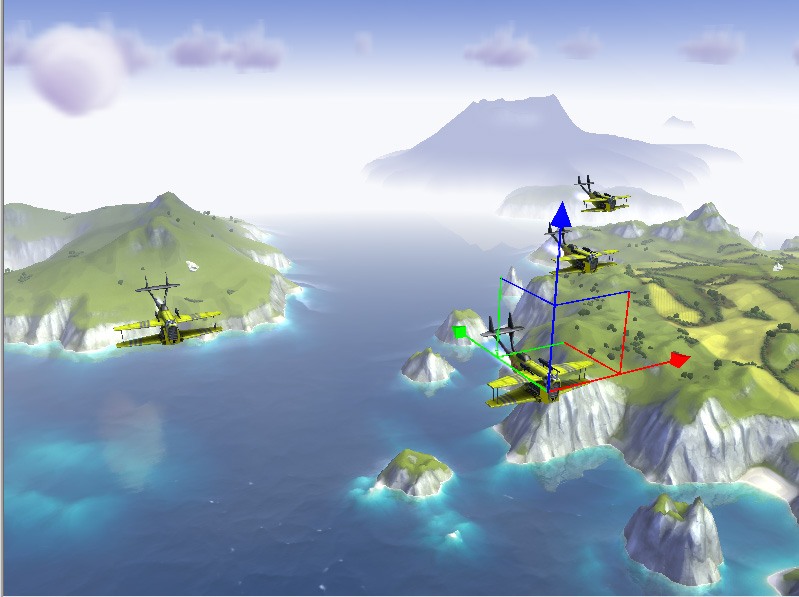
Use the vertical gizmo to move up the spawn point: by default aircraft spawn flying, we wouldn’t want our aircraft to crash at spawn.
A gizmo is perfectly blending in…
To actually make our aircraft spawn, we need to edit the mission script. Serious stuff is coming.
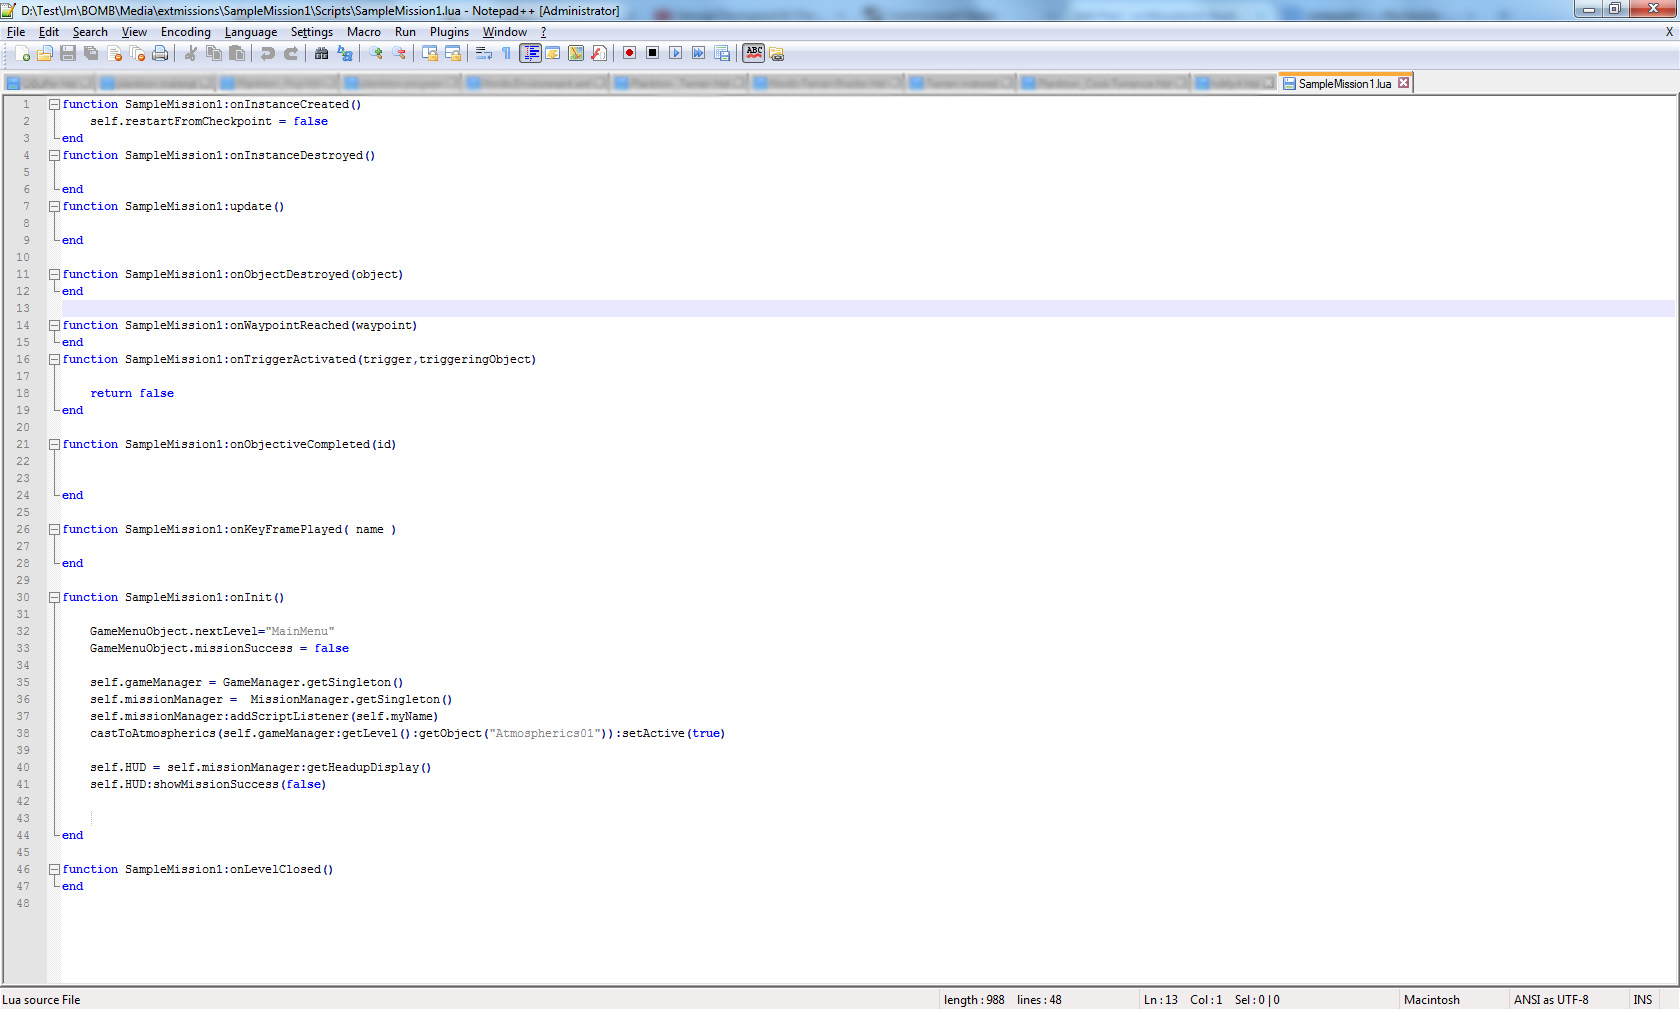
Open the file [BOMB_install_folder]/Media/extmissions/[MissionName]/Scripts/[MissionName].lua with your favourite text editor. We recommend notepad++.
The file looks like this:
Notepad++: Awesome, free, open source, and French made, just like Marcel Gaston.
Locate the function named [MissionName]:onInit().
This function is called at each start (or restart) of the level.
After the line self.HUD:showMissionSuccess(false) (line 41), add:
The first parameter is always 0.
The second one is the model of the airplane (see the skin creation tutorial).
The last one is the team of the flight. It can be: 0 neutral 1 fighting Team 1 2 fighting Team 2
Usually we set the player team to 1 and the enemies to 2.
Now gets a reference to the player’s flight by doing:
Finally, set the player initial position and orientation according to the spawn point:
local spawn_point = self.gameManager:getLevel():getObject("player_spawn")
self.playerAircraft:setInitPosition(spawn_point:getPosition())
self.playerAircraft:setInitOrientation(spawn_point:getOrientation())
And also it’s initial speed, in meters per second:
self.playerAircraft:setInitSpeed(100)
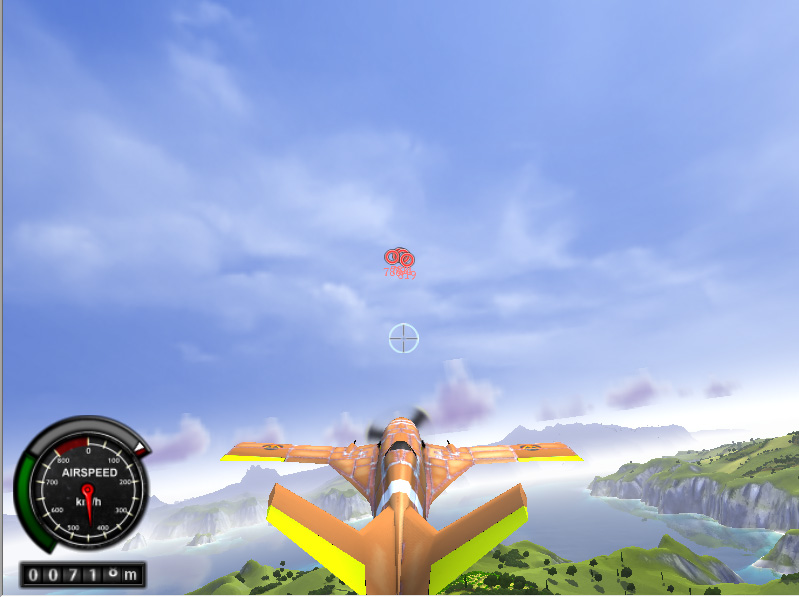
Press F6 to recompile the script and then F5 to play: the aircraft is flying !
You can stop the game by pressing F5 another time, and then press F6 to reset the level.
In this mission we’d like the player aircraft to start landed.
Teleport the spawn point somewhere on the runway.
Go back to the script and change the initial speed from 100 to 0.
Then tell the engine not to mess with physics by considering the player’s plane landed and its gear down.
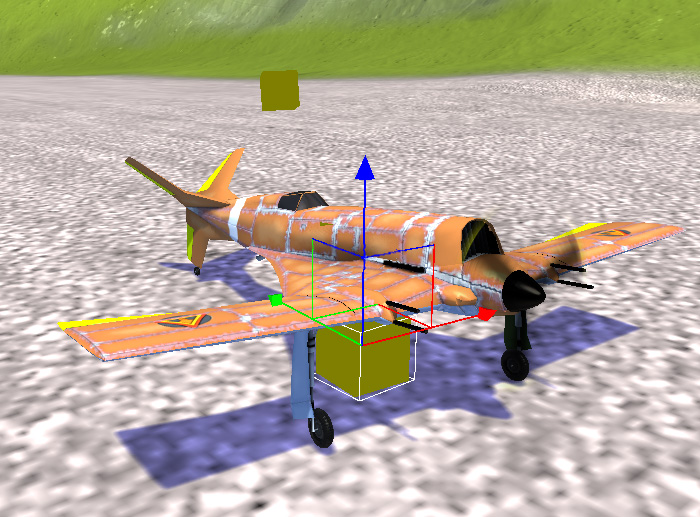
You’ll surely need to rotate the spawn point so that the aircraft’s direction is toward the runway. To do so, press Y and rotate along the up / y axis (the blue one) so that the direction /z axis (the green one) is parallel to the runway.
Notethat the direction of the spawn point is inverted compared with the aircraft direction.
Press F6 to reset and F5 to play: our Astore is landed!
Enemy aircraft
Now we want to add an enemy flight of aircraft.
Go to somewhere in the sky, and create a newmission object, select the AI Flight category, and pick the desired model. Here, we’d like to have some Bilbies, so select AI_PLANE_11.
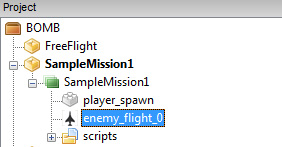
Name it “enemy_flight_0″.
Select the flight in the left tree view
The flight properties will now be displayed on the right panel:
Change it’s aircraft count to “4” (the maximum allowed, don’t try more, this will surely crash hehe)
Then sets the team to 2
And reinit the level (F6) to make them spawn.
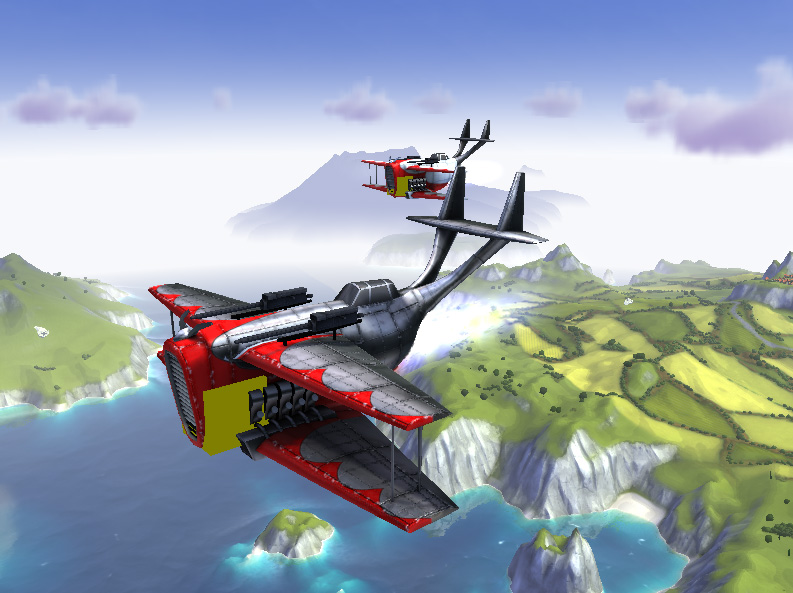
A flight of wild billbies appear.
You can change their original direction by rotating the flight scene object. This is a bit disturbing because aircraft won’t reorient themselves until F6 is pressed.
All of this may seem complicated and harsh but after a few hours you’ll think it’s the best editor ever. (or not…)
Tip: It’s better to switch to “local space” transformation to rotate flights.
This flight won’t do anything until they have an objective.
We’ll now speak about one of the biggest part of the tutorial: the objectives.
The first line is obvious, we’ve seen it already: we are retrieving a reference to the flight we’ve just created.
The second line is the creation of the objective. The first parameter is the team that will treat the objective, and the second parameter is the flight to be intercepted.
The last line is obvious too: we assign the newly created interception objective to the enemy flight. They’ll now try to attack you.
We’ll see later more types of objectives allowed in the game;
Press F6 then F5 to test.
Note: the Billbies will probably never attack you directly, because as you are starting landed, they’ll first have to avoid the terrain. This is a limitation of the AI for now, we’ll fix it.
Changing aircraft skin
You can change the skin of any aircraft using the script if you don’t want them to use the default one (or if you are providing your own skins with your missions).
You can change it for every aircraft of a flight:
self.enemyFlight:setMaterial("AI_PLANE_11_racer")
Or for the leader aircraft only to give if a specific look:
It’s really different from classical mission creator tools often released with flight sim games such as Il-2 or DCS because it’s based on the level editor of our multi purpose game engine.
You may find that the mission creation workflow isn’t as simple as in other titles in the genre but one can achieve much more customized mission and objectives.
Mission building (a.k.a Level Design) consists in mainly two steps:
Placing objects
Scripting events
Let’s start with an overview of the interface.
Note: the editor is only available on Windows for now.
Overview
Locate and execute the MissionEditor.exe file in the [game’s folder]/Bin/Release/ folder.
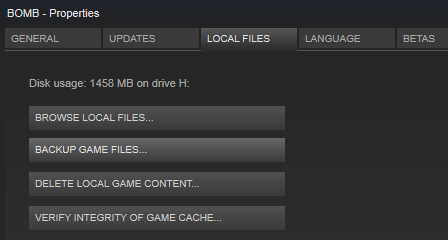
If you’re using Steam, a convenient way to locate it is to click on Browse local files in the Local files tab of BOMB’s Properties.
When you launch MissionEditor.exe it can be a long loading time takes some time as it will load all game’s resources at once.
Open the Free_flight levelby double clicking on it in the left-side tree view.
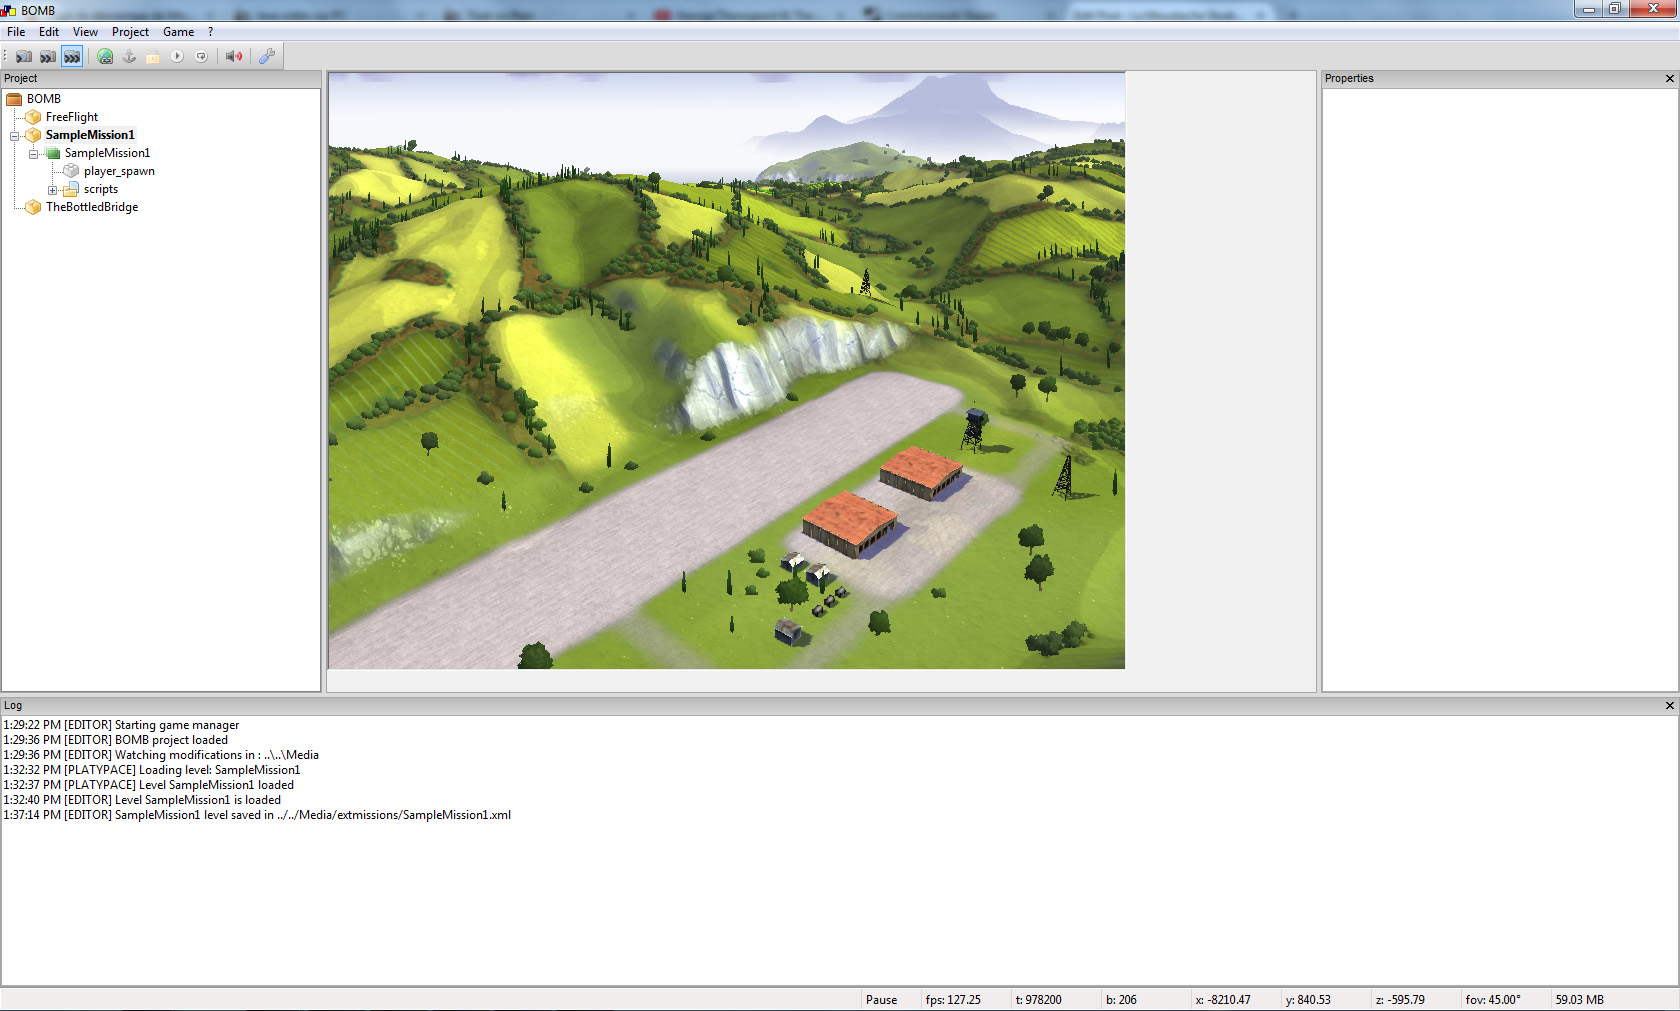
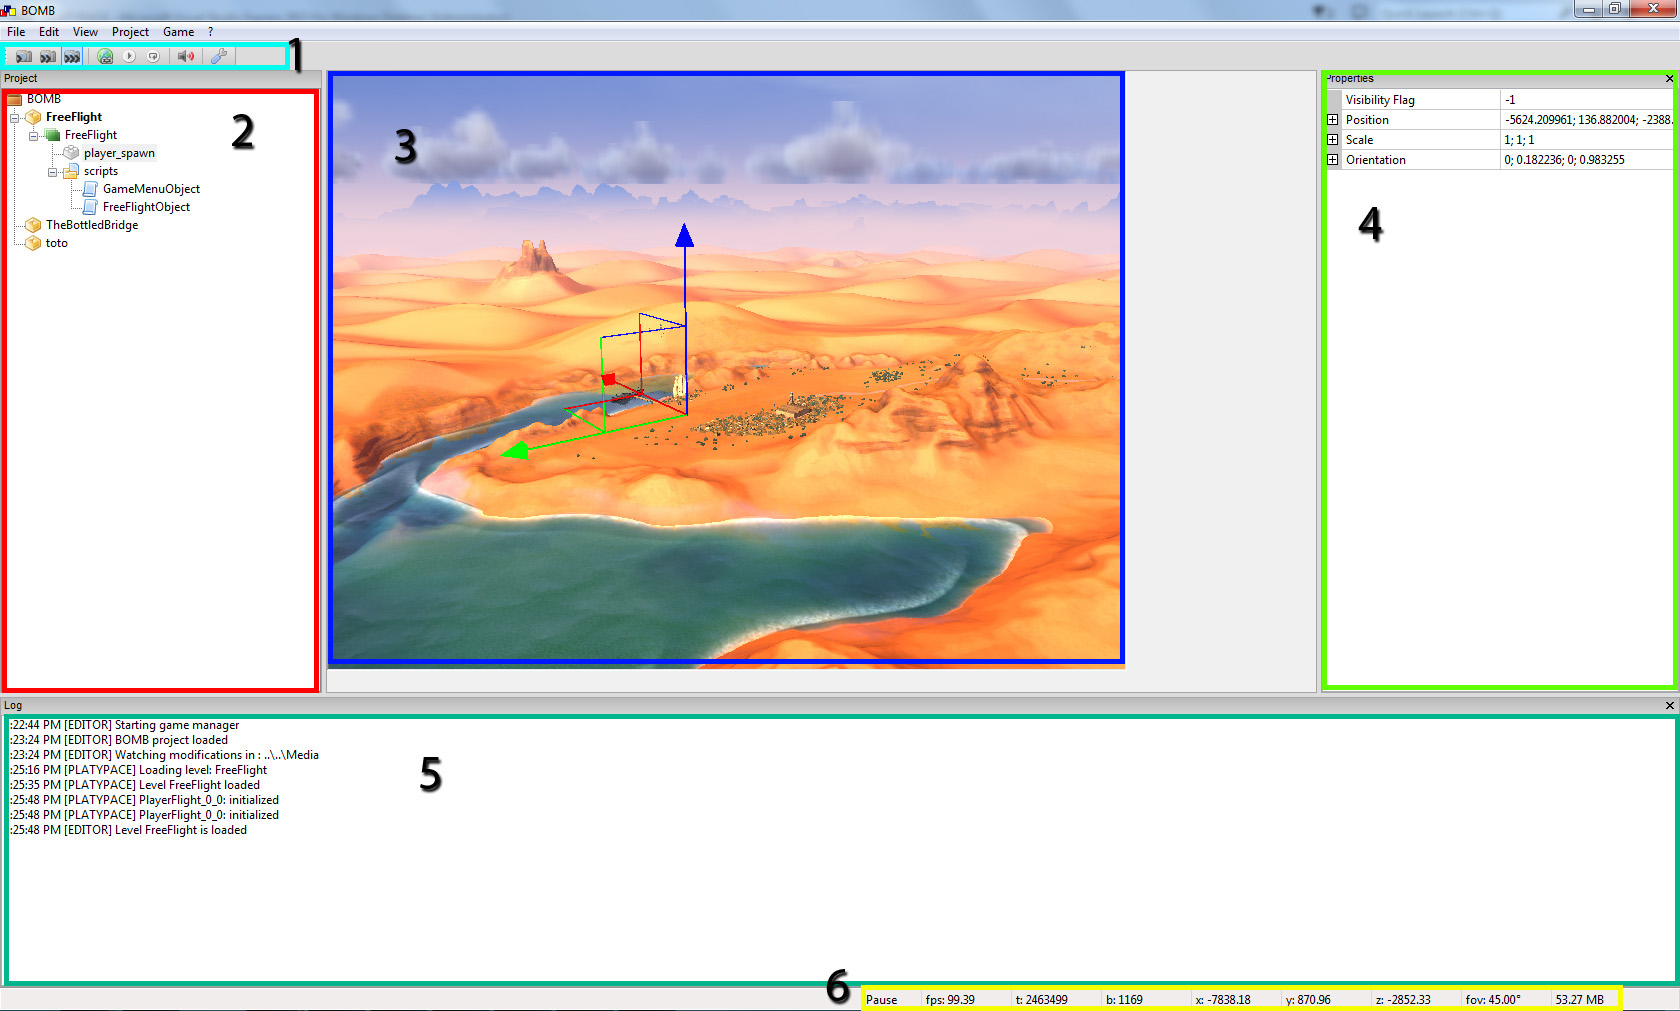
This is what the mission editor looks like once a mission has been loaded
The toolbar
3 camera speed buttons (from slow to fast)
The coordinates button (the earth-looking one) switches between world-space and object-space manipulation (when moving or rotating an object)
The play button starts playing the mission into the editor
The re-init button resets the mission to it’s initial state
The mute/unmute button
The settings button, where you can change the three camera speed and also the 3D window size (need to restart)
The tree view
Project’s hierarchy
The list of levels, the loaded one being boldfaced.
The list of game objects sorted by layers.
The 3D view, a.k.a the viewport
You can work with objects inside this window when the game isn’t running.
When the game is running, the content is what you’d see in game.
The properties. Most of time you’ll never have to touch this. However for some objects like vehicles or ships you’ll need to, and this will be described in another tutorial.
The log: same here, don’t mind about 99% of the information displayed here, but if ever you see some RED TEXTin there, something has gone wrong, surely when writing the script of the mission, and this will tell you what’s the error.
The status bar displays somegeneral information. Most important are the x/y/z information which tell you where you are in the level.
Using the viewport
You can navigate inside the level by using the viewport (the 3D view).
To rotate the camera, move the mouse while holding the right mouse button.
To move, use the WASD keys, just as in every FPS.
Use the camera speed buttons to change the velocity of your displacement.
You can also use the mouse wheel to move forward/backward.
The tree view
For convenience the campaign, skirmish and race levels are hidden, displaying only what we’re calling externalmissions, which are single missions created by us, and hopefully, you 😉
Double click on a level to load it in the editor.
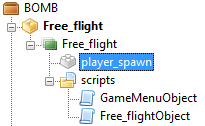
Level’s objects are sorted by layers (the green icon). The level’s layer always has the same name as the mission. This is where your objects are located.
Script files are visible in the scripts folder.
Editing objects
You can select object by either pick them in the viewport with the left mouse button or either by clicking on their name in the tree view.
Basic manipulation of objects in the level are done by dragging the gizmos, wich allow to change objects position, orientation and scale (but avoid as much as possible to change the scale).
To display the translation gizmos, press the T key.
To display the rotation gizmos, press the Y key.
To display the scale gizmos, press the U key.
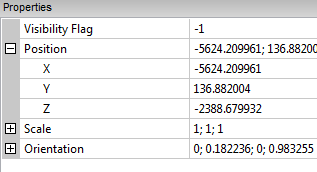
Properties
You can edit the object’s properties directly in the Properties view.
When an object is selected, its properties are automatically populated.
Il est assez facile de rajouter ses propres camouflages (skins) pour BOMB et voici une sorte de tutoriel présentant la fonction des différentes textures, et également comment créer une skin simple.
Tout d’abord, voici un petit tableau présentant les correspondances entre les noms des avions et leur nomenclature, avec en lien des archives contenant différentes textures de bases.
Les dossiers relatifs à ces avions sont dans BOMB/Media/objets/aircrafts
ATTENTION: ceci n’est pas un tutoriel à vocation “artistique”, mais juste un explicatif technique sur la façon de procéder.
ATTENTION 2: C’est la première fois que je fais un tutoriel, donc il n’est pas forcément très clair.
Lancez votre éditeur d’images préféré (nous utiliserons GIMP ici puisqu’il est gratuit et donc accessible au plus grand monde. Mais à peu près n’importe quel outil fera l’affaire, même MS Paint. Non, bien sur, pas MS Paint. Il faut au minimum une gestion des calques.)
Nous allons créer une skin pour le King KAC-B, avion phare du jeu.
Une fois l’archive P_PLANE_F.7z téléchargée, décompressez là où vous voulez.
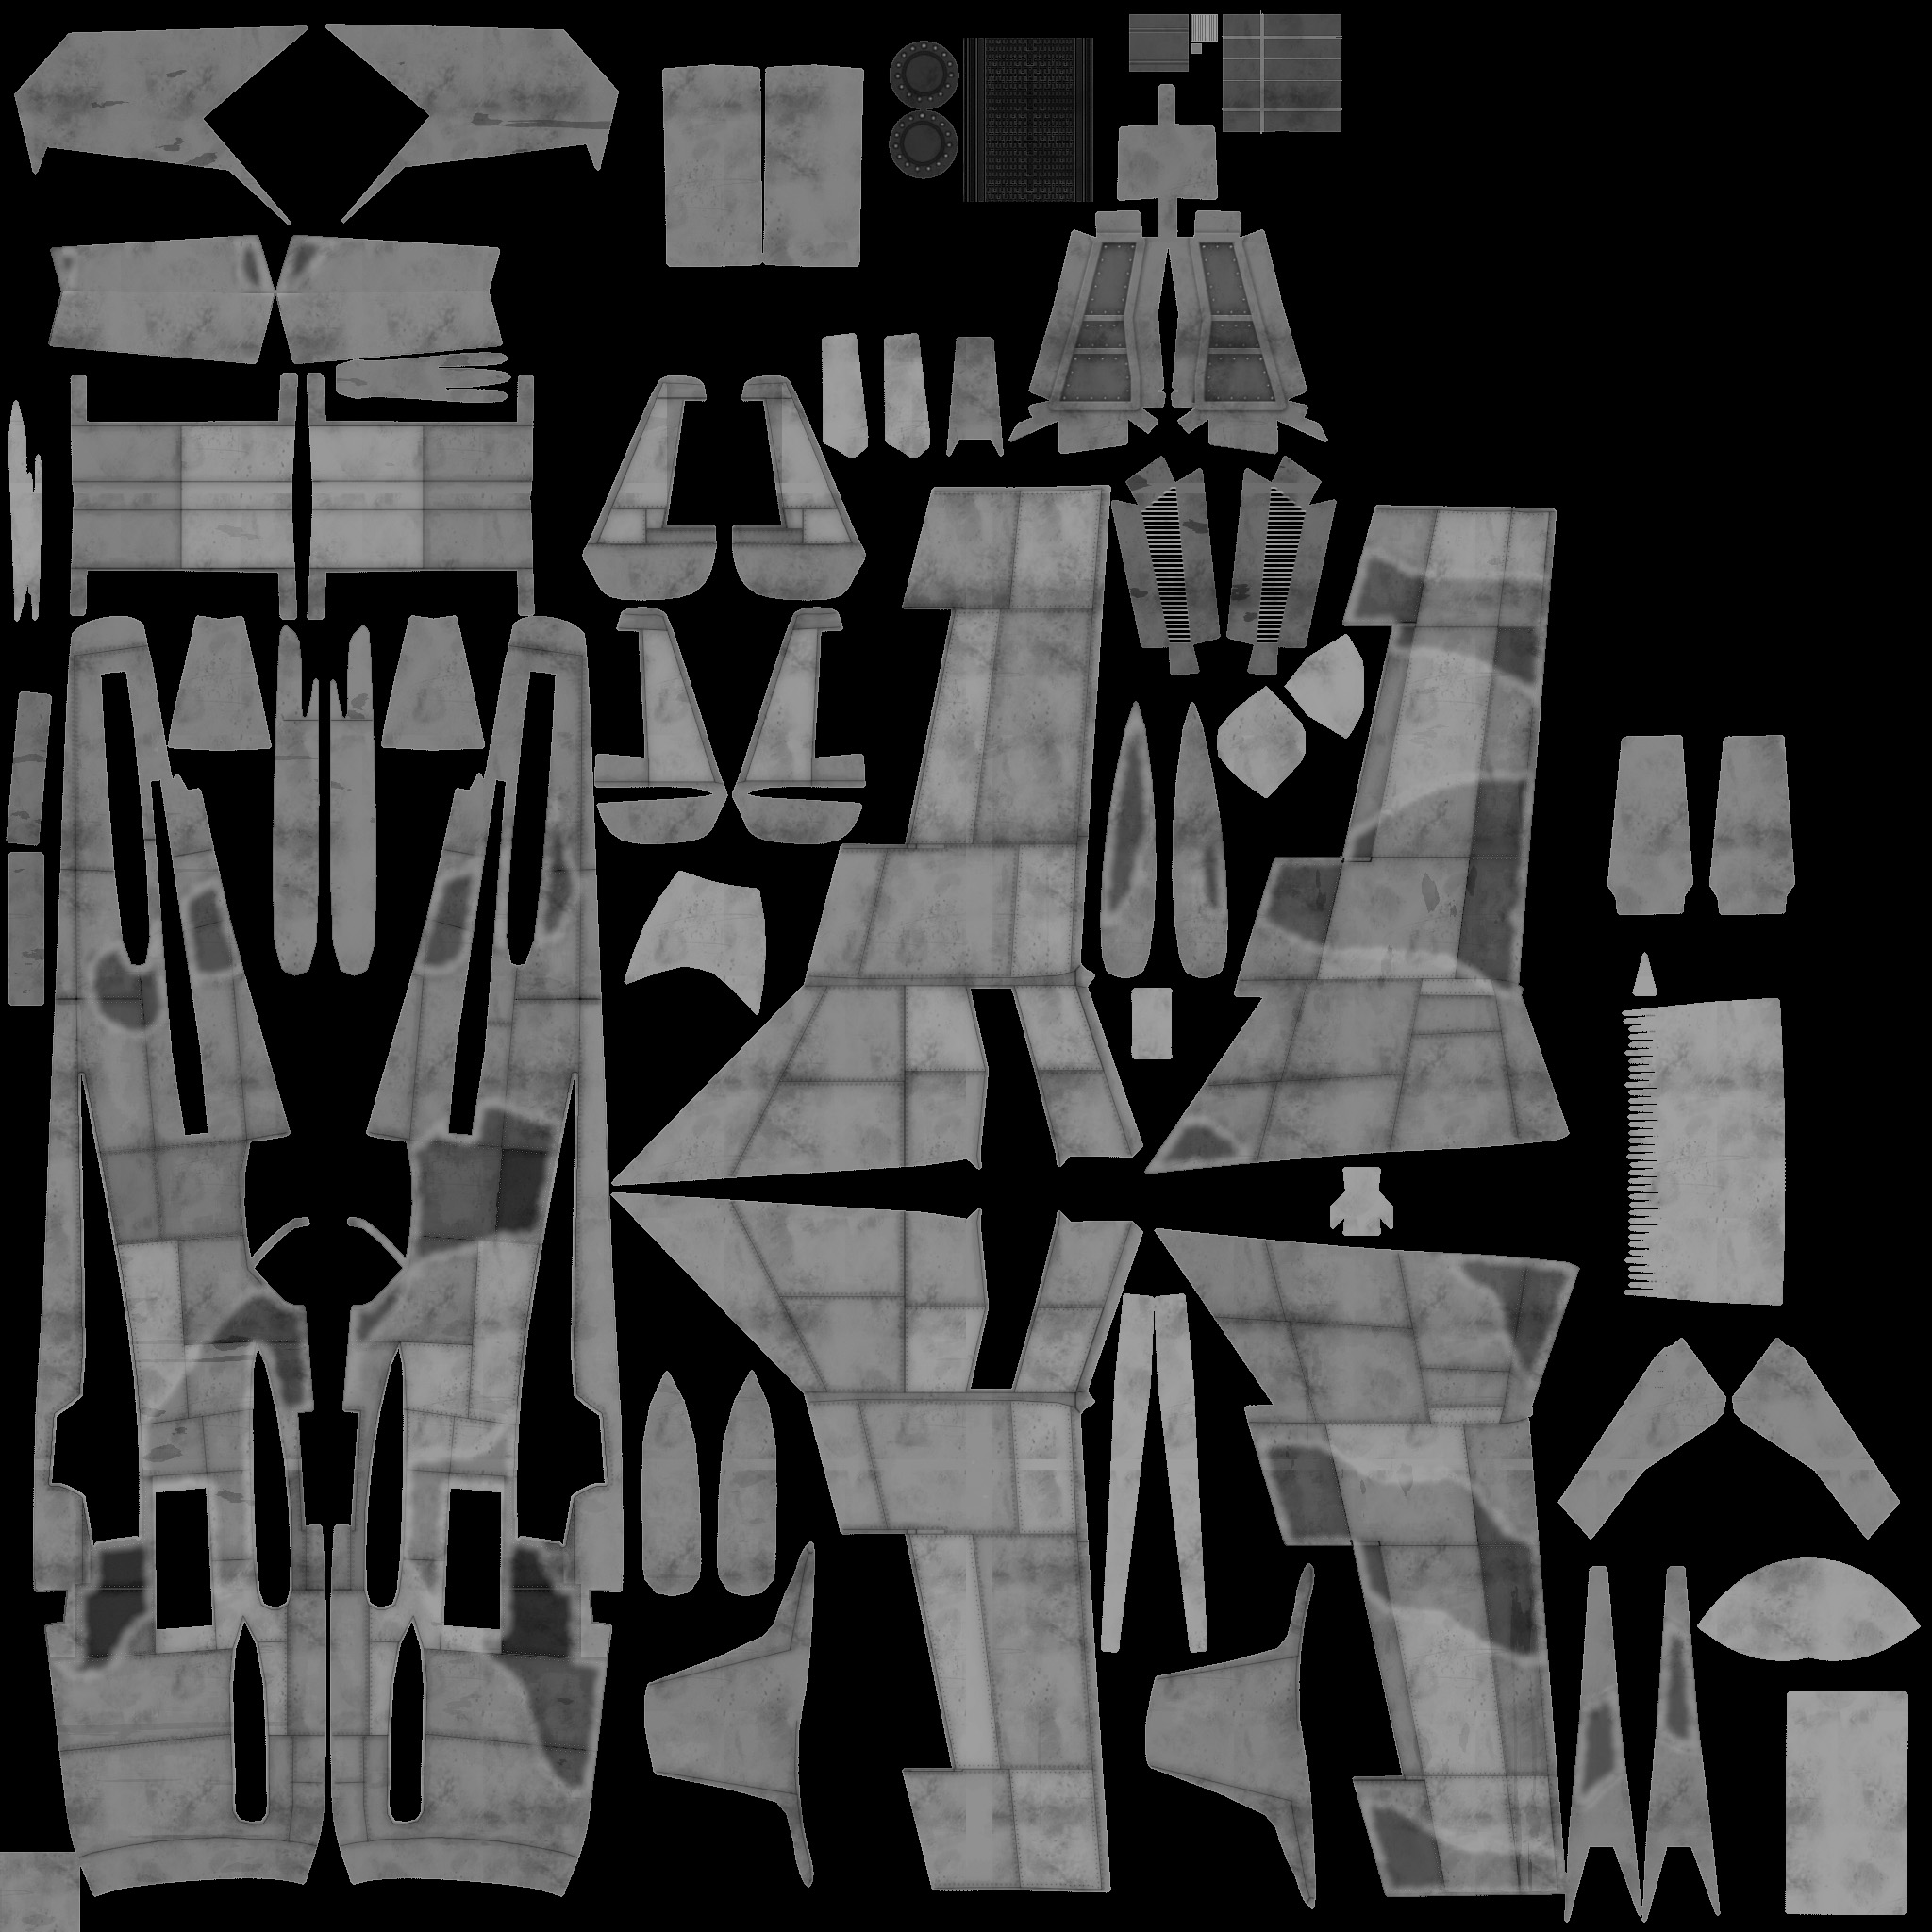
Celle-ci contient plusieurs fichiers tga, qui sont les mêmes pour tous les avions, à savoir:
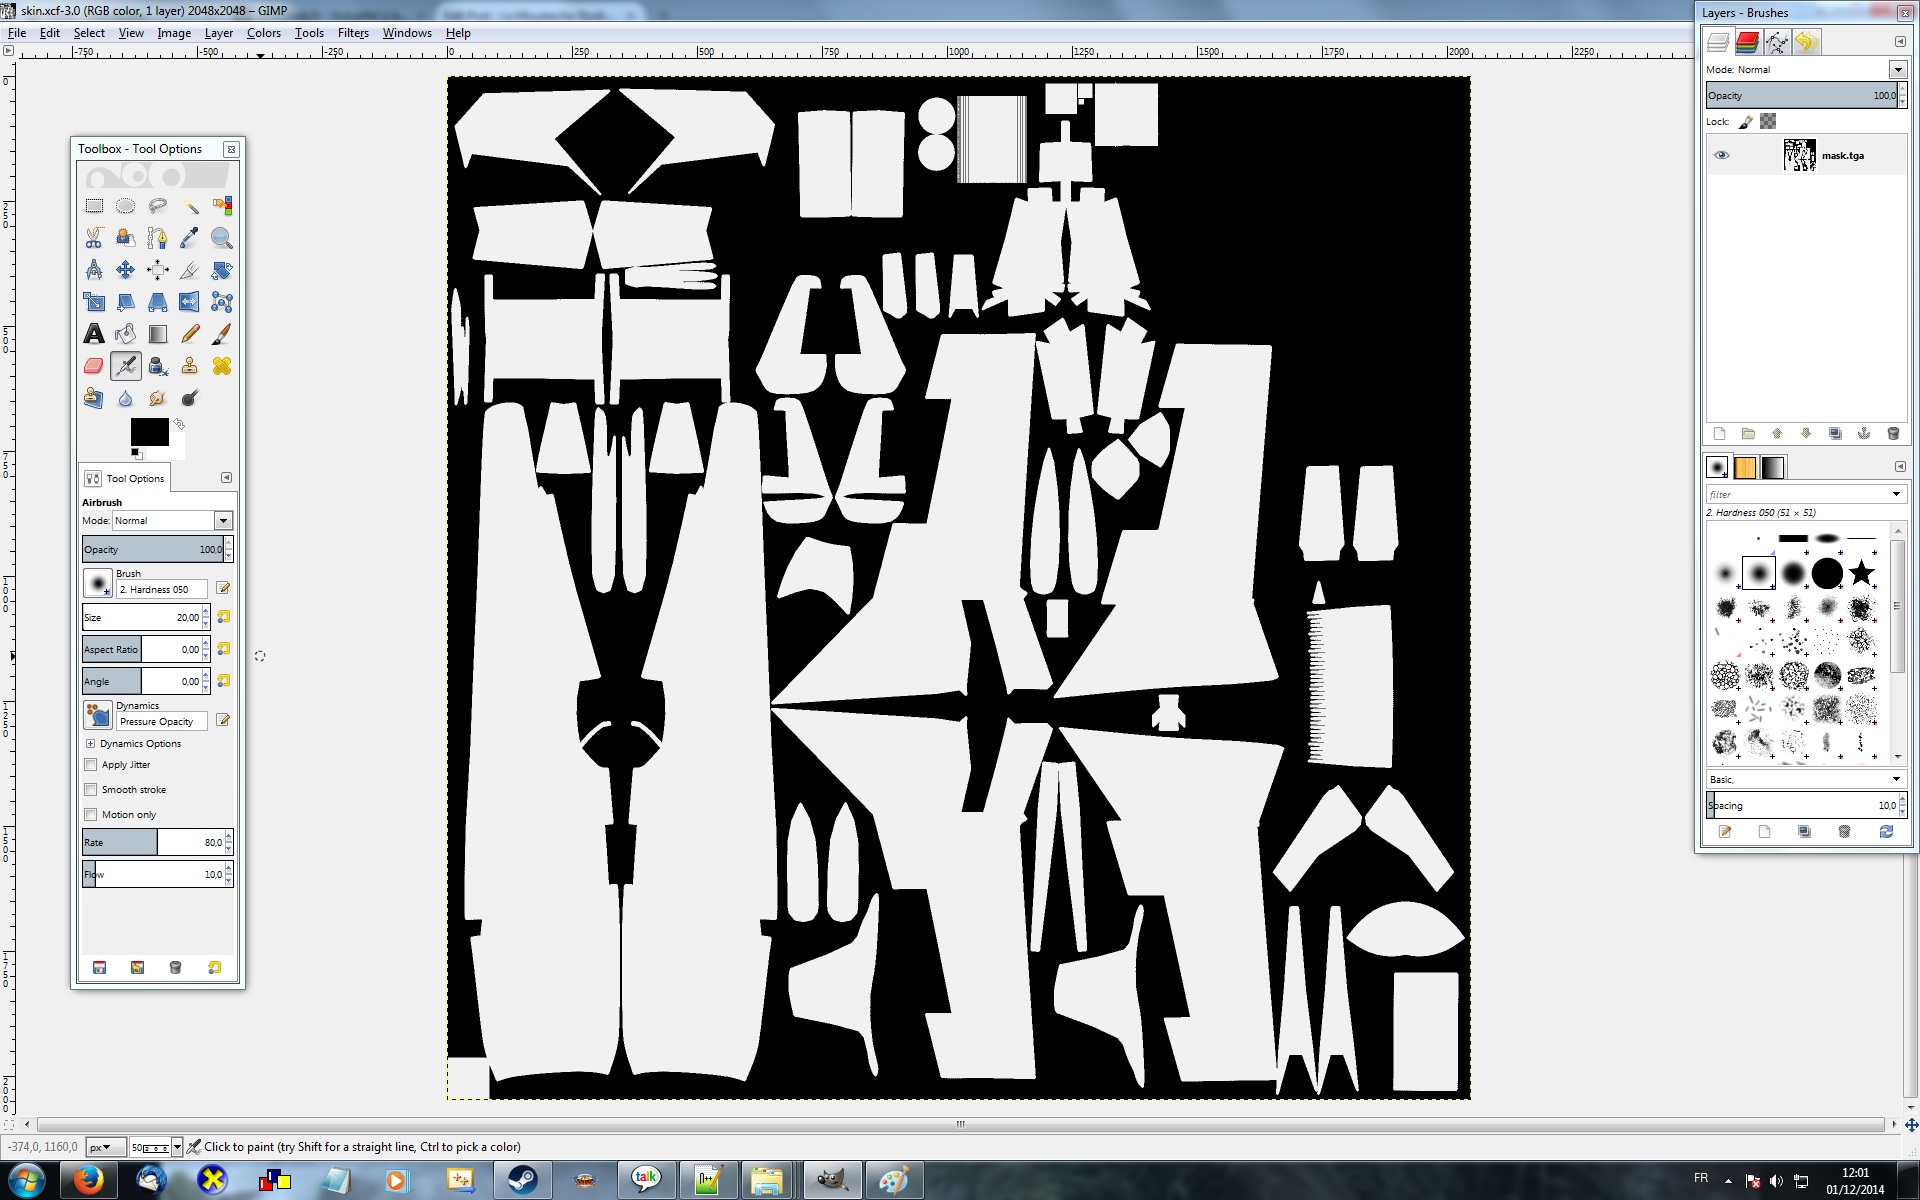
mask.tga : comme son nom l’indique, c’est l’image de masque général, qui permet de voir quelles parties de la texture sont utilisées
lines.tga : ce sont les lignes de structures de l’avion.
rivets.tga : ce sont les rivets de l’avion.
structlines.tga: celle-ci est un peu plus compliquée et ne sert pas pour la création de skin directement, sauf cas particuliers, nous y reviendrons plus tard.
Éventuellement un fichier internals.tga contenant les parties relatives aux radiateurs, vitres, et aux trains d’atterrissage.
Ouvrez l’image mask.tga, et enregistrez la sous la forme d’un workspace GIMP (extension .xcf);
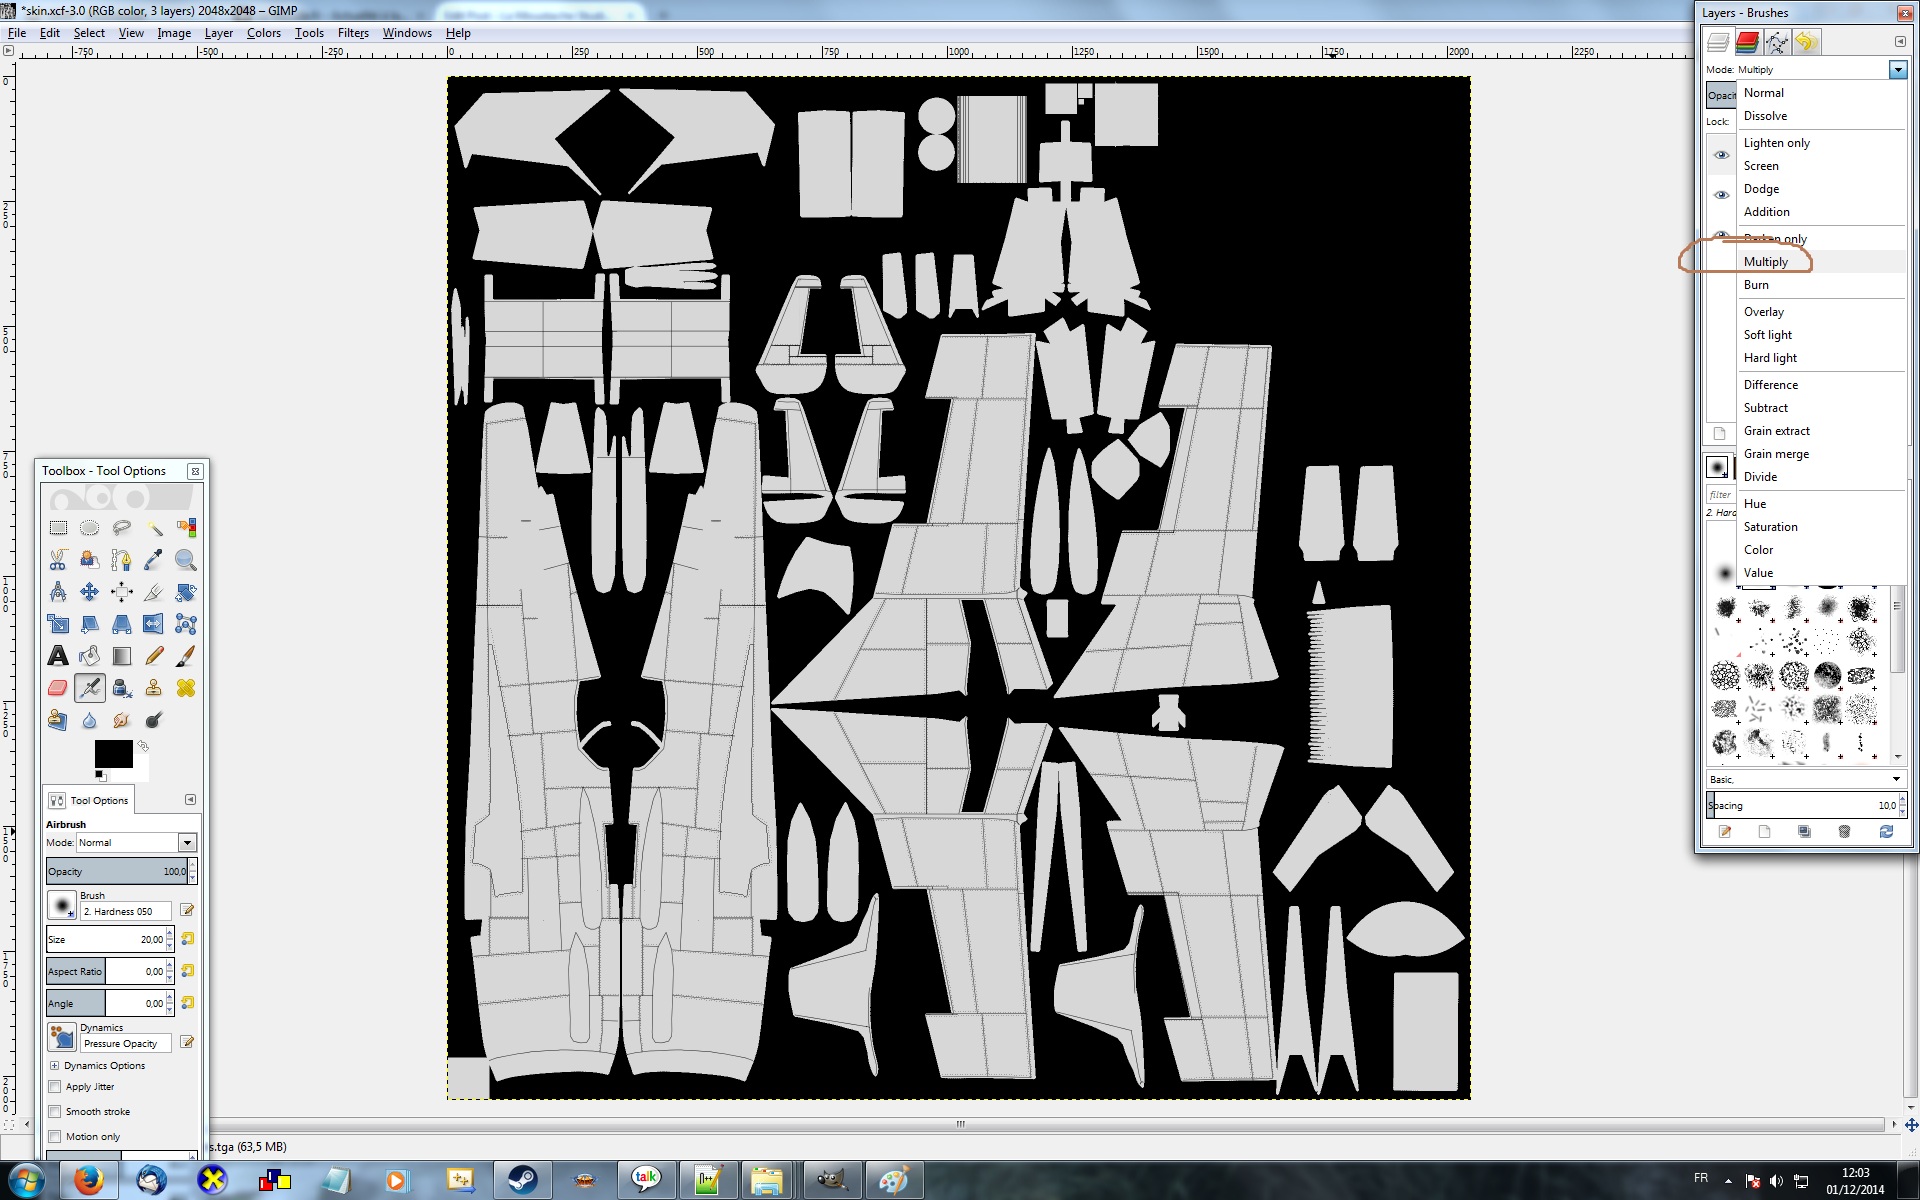
Dans ce workspace, ouvrez lines.tga et rivets.tga en tant que nouveaux layers (file / open as layer)
Pour y voir plus clair, passez ces deux layers en mode multiply:
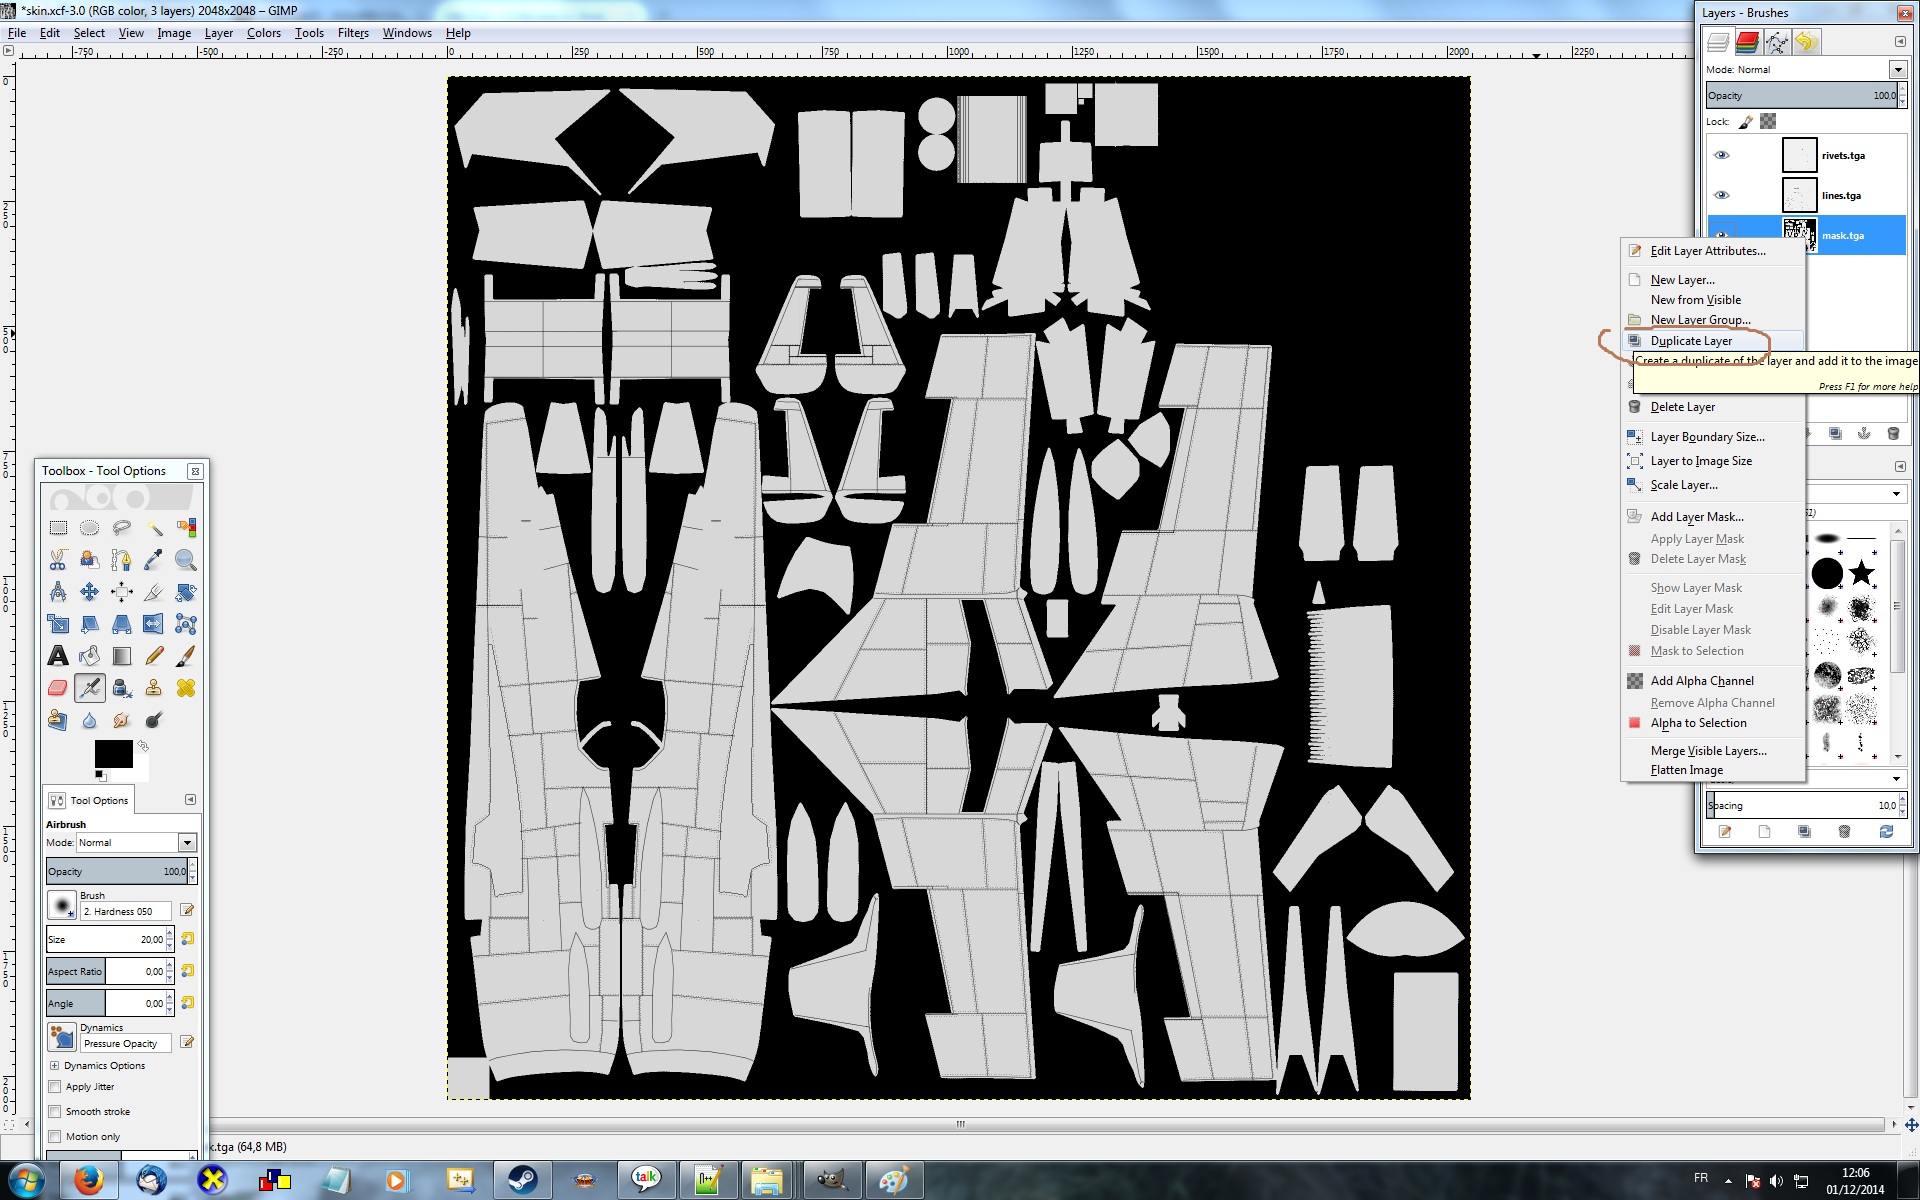
Dupliquez le calque de masque,mettez le masque nouvellement créé tout en haut de la pile, puis passez le également en multiply.
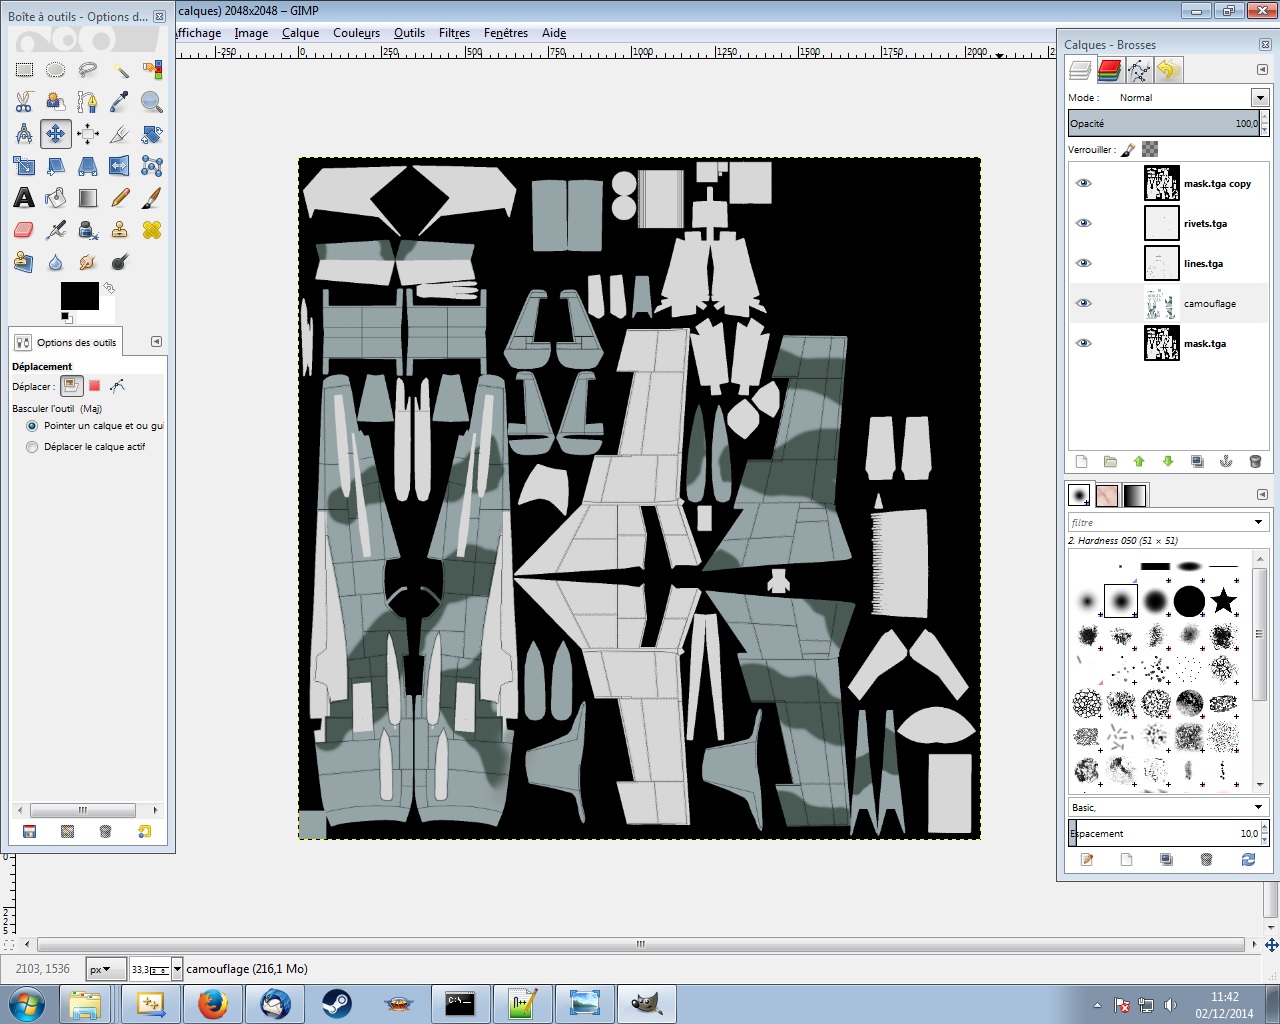
Juste au dessus du premier calque, créez un nouveau calque que nous appellerons “camouflage”.
Maintenant on peut commencer.
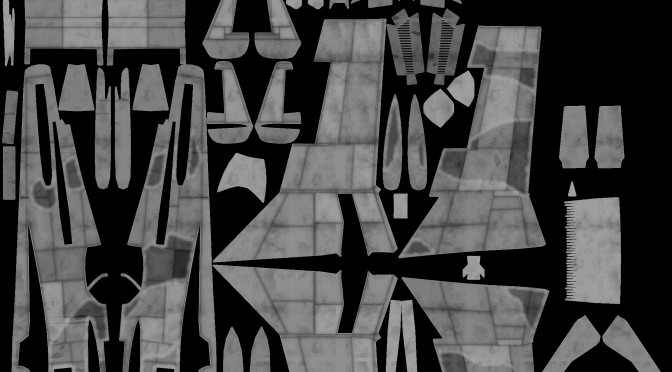
Comme je l’ai dit, ce tutoriel n’a pas vocation à être artistique, donc je vais choisir quelques couleurs et barbouiller ma skin avec, ce qui va donner ça:
Pour plus de réalisme on va rajouter un peu de “patine” rapidement.
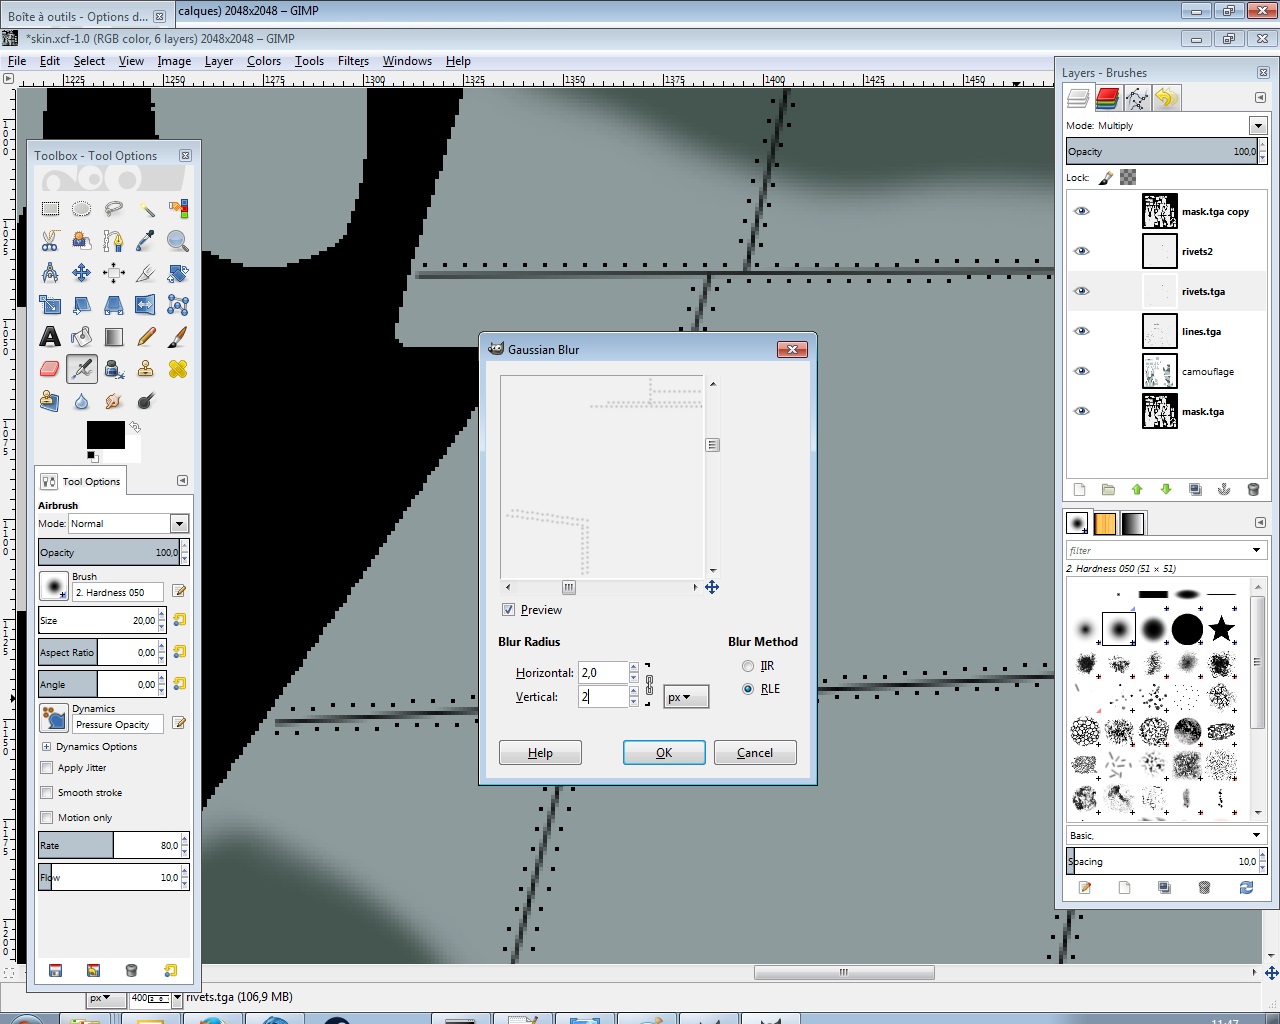
Premièrement dupliquons le calque de rivets. Sur le calque original, on va appliquer un léger blur : menu filters/blur/gaussian blur.
Mettre la taille du blur à 2 pixels:
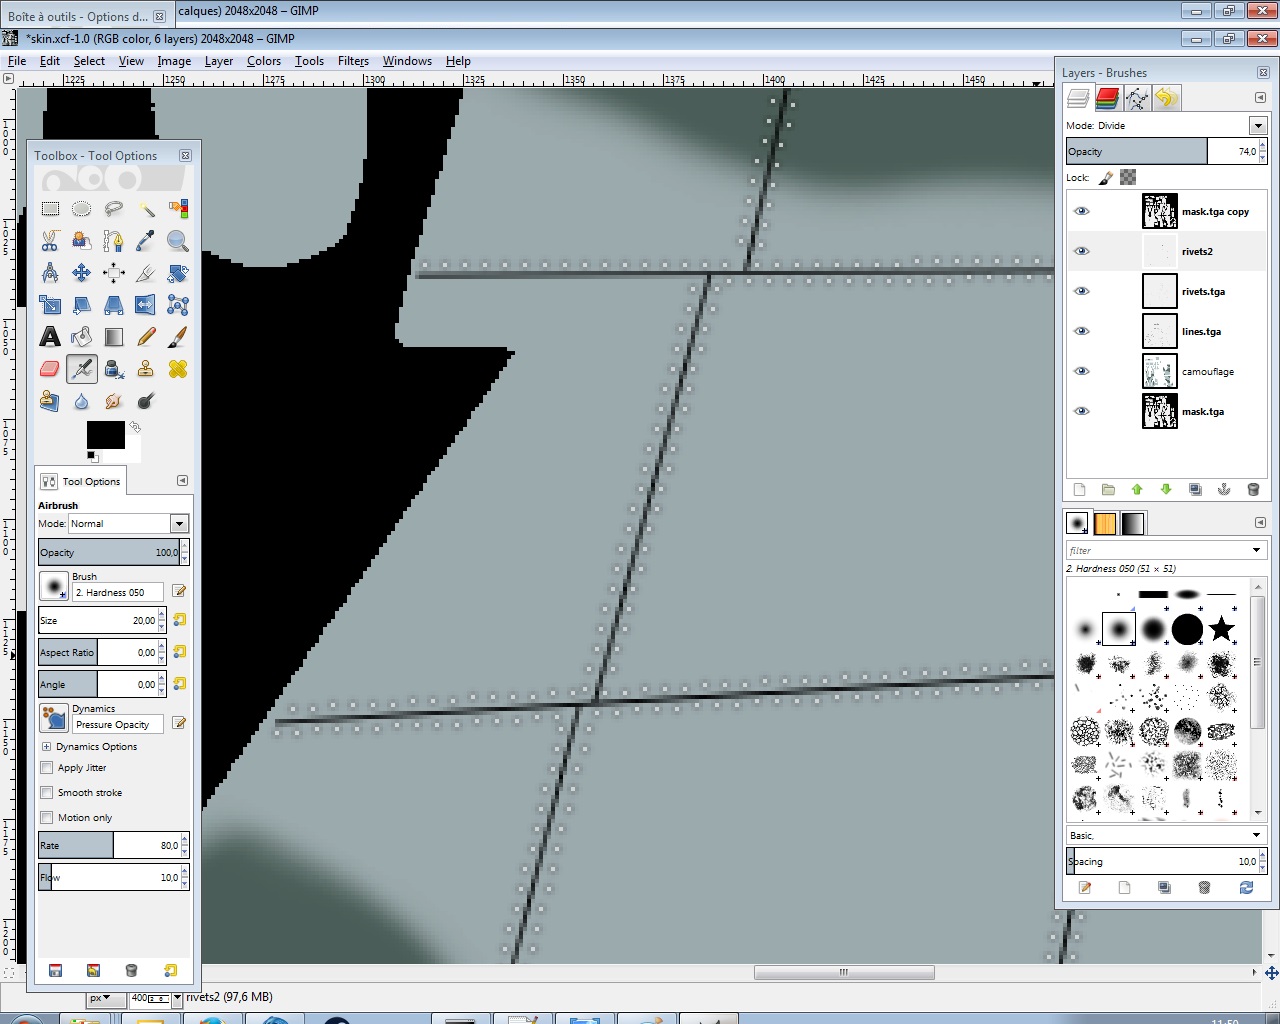
Passer le calque de rivets précédemment dupliqué en mode divide avec une opacité de 75%, ce qui donne ceci:
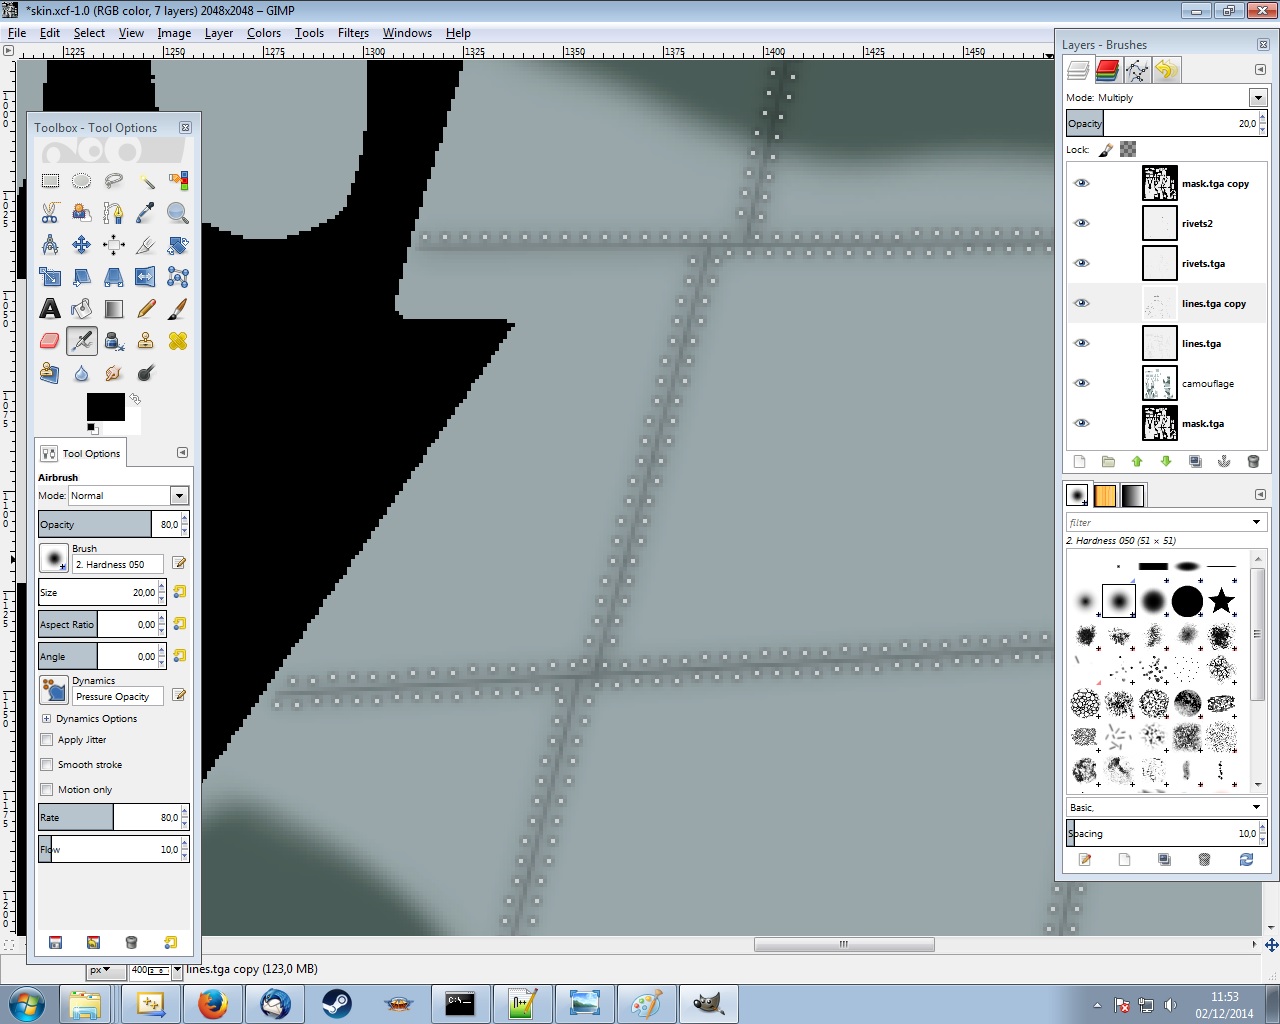
Maintenant, dupliquer le calque des lignes de structures, et appliquer un gaussian blur de 10 pixels sur celui-ci.
Enfin, changer l’opacité du calque de lignes de structures original à 20%:
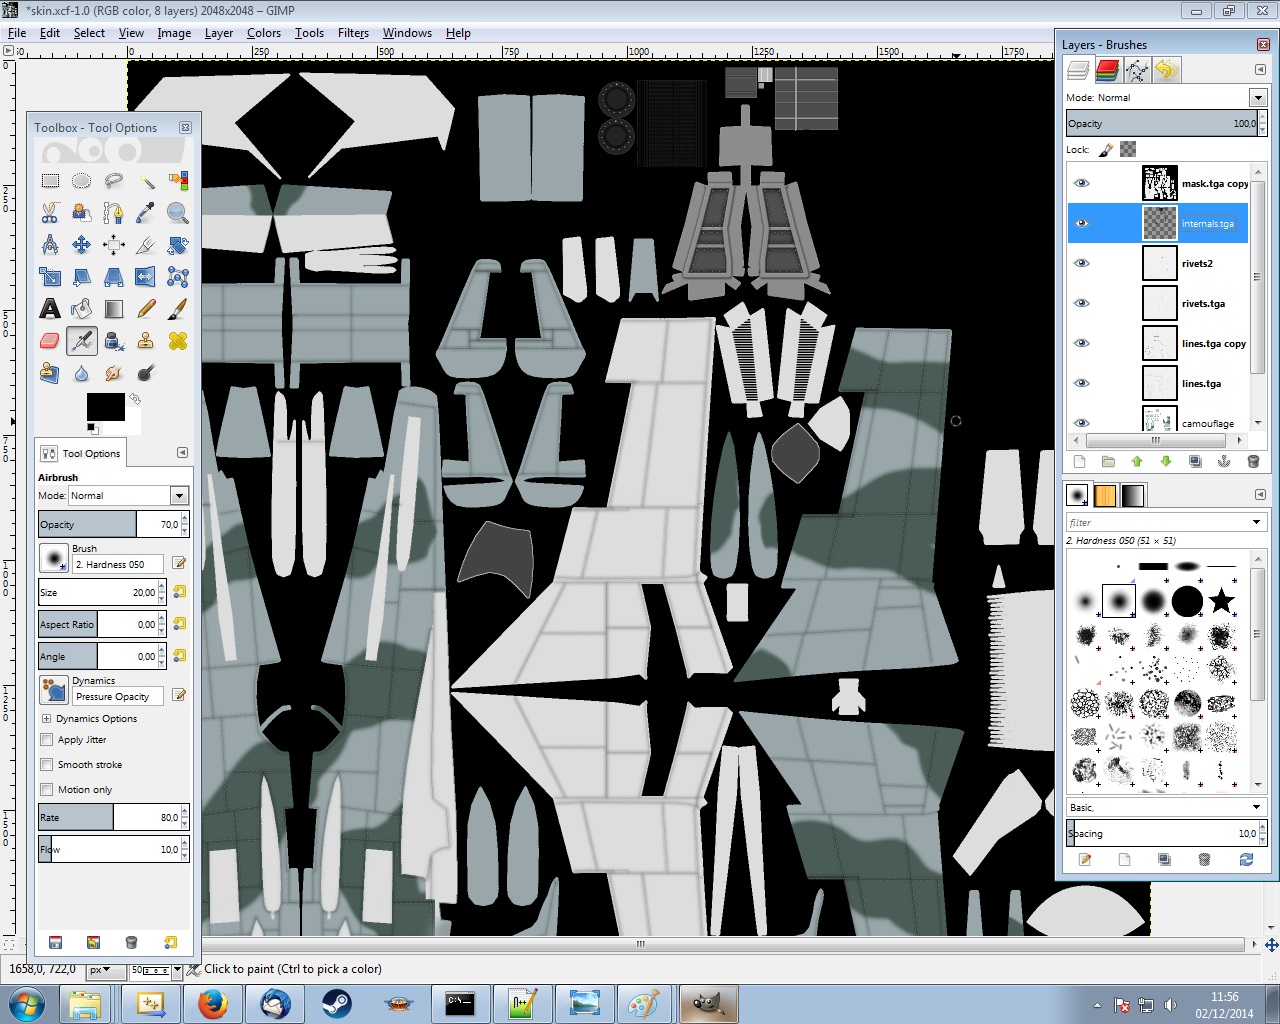
Ouvrir si elle existe la texture “internals.tga” en tant que calque et placer ce calque tout en haut de la pile:
Voilà ! Notre première skin est faite.
Il ne reste plus qu’a exporter notre image en tga sous le nom P_PLANE_F_MySkin.tga, en mode 32 bit. Il est important d’avoir une couche alpha sur la skin, car celle-ci contient un masque de spéculaire, c’est à dire le masque de réflexion de la lumière. Par défaut, laisser cette couche alpha en blanc ou en gris suffit, mais pour exemple, voila à quoi ressemble un masque de spéculaire un peu travaillé:
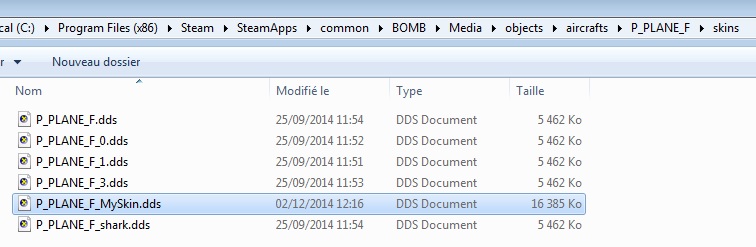
Copier le fichier dds dans le dossier BOMB/Media/objects/aircrafts/[MODEL]/skins, dans notre cas ça sera BOMB/Media/objects/aircrafts/P_PLANE_F/skins
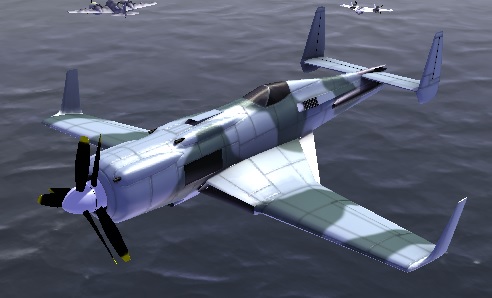
Enfin, lancez le “viewer.exe” qui est une version minimale de BOMB permettant de lancer rapidement un skirmish. Ce programme se trouve à côté de l’executable de BOMB, dans le dossier “BOMB/bin/release”.
Faits défiler les skins de l’avion avec les touches “haut” ou “bas”, et vous verrez votre skin sur l’avion.
Pour finir, nous allons préciser quel rôle a chaque texture utilisée par un modèle d’avion, et surtout le rôle des différents canaux utilisés dans chacune d’entre elles.
Tout d’abord, la texture [MODEL]_Structline.dds :
Le canal R contient les lignes de structures, en version très claire, ce qui permet de les appuyer légèrement lors du rendu.
Le canal G contient l’occlusion ambiante de l’avion, utilisée pour l’éclairage également.
Le canal B contient les lightmap des canons, utilisées pour éclairer l’avion de façon plus convaincante quand les canons tirent.
Le canal A contient les zones de réflexion. C’est à dire les parties de l’avion ayant un aspect “métallique” ou alors les parties vitrées. Dans ce channel, une valeur de 255 signifie aucune réflexion, une valeur de 0 signifie réflexion totale.
Ensuite nous avons la normal map, celle-ci est nommée [MODEL]_Normal.dds
Et enfin, la texture de dégâts, nommée
[MODEL]_Damages.dds
Dans celle-ci
Le canal R contient les dégâts mineurs
Le canal G contient les dégâts mineurs + lourds
Les canaux B et A ne sont pas utilisées pour le moment.
NOTE: Normalement, la texture [MODEL]_StructLines.dds est unique pour toutes les skins de l’avion. Cependant, il est possible de la surcharger pour une skin en particulier en en créant une nouvelle qui a pour nom de base celui de la skin, suivi suffixe _StructLines.
Par exemple, la skin du Bilby nommée
AI_PLANE_11_racer_metal.dds
possède sa propre map StructLines
AI_PLANE_11_racer_metal_StructLines.dds
Cette possibilité de surcharge existe aussi pour la normal map, mais n’est pas présente actuellement pour la damage map.
It’s pretty easy for anyone to add their own skins for BOMB and here’s a tutorial detailing how to do it.
Notice: This tutorial is not made from an artistic point of view, but solely a technical how-to.
The list below links all the planes from the game to its a template containing a full texture set. The second name, the one with the link is the internal (in engine) name of the plane.
Their respective folders are found in game_installation_directory/BOMB/Media/objets/aircrafts
Use your favorite image editor software (we are using GIMP here because it’s freely available for everyone, but basically any editor with layer and TGA support can get the job done).
Let’s start with a skin for the King KAC-B, which is the main plane in the game.
Download and extract the P_PLANE_F.7z archive anywhere you choose. It contains several TGA files, always organized as:
mask.tga : a general mask showing the plane’s parts (for editing help purpose only, it’s not used in game)
lines.tga : structure lines (the separations between parts)
rivets.tga : plane’s rivets (you know… lots of them)
structlines.tga: Not used directly for skin creation. We’ll speak more about that file later.
internals.tga (optional): radiators, glass and landing gear parts.
Open the mask.tga file and save it as a GIMP workspace file (.xcf extension).
In this workspace, open lines.tga et rivets.tga as new layers (file > open as layer). For better display, set them in multiply mode:
Duplicate the mask layer, put the new one on top of the stack and set it in multiply mode.
Just above the first layer, create a new one labeled as “camo”.
As I said, this tutorial is not for artistic purpose, so assume that I choose a few colors and paint my skin with them, leading to:
We can achieve quickly an used look.
duplicate the rivets layer
on the original one, apply a 2 pixels gaussian blur: filters > blur > gaussian blur
set the duplicate one in divide mode with a 75% opacity:
duplicate the structure lines layer
apply a 10 pixels gaussian blur on
set the original one with a 20% opacity:
Open internals.tga as a new layer if it exists and move it on top of the stack:
Voilà ! Our first skin is done.
Now we need to export the image as a TGA file named P_PLANE_F_MySkin.tga, in 32 bit mode. It’s very important that the skin has an alpha layer because it contains a specular mask (i.e. light reflection mask). By default, setting this alpha layer to white or gray is sufficient, but to provide the best example, here’s what a worked out specular mask looks like:
Convert the TGA file in DDS file format with DXT5compression using one of the many existing tools (e.g. a GIMP export plugin).
Copy the dds file in BOMB/Media/objects/aircrafts/[MODEL]/skins, in our example it is: BOMB/Media/objects/aircrafts/P_PLANE_F/skins
Finally, launch viewer.exe, which is a minimal BOMB build to quickly start a skirmish. This program is located next to the BOMB main executable, in BOMB/bin/release.
You can switch between available skins by pressing the up and down keyboard keys.
To better understand how it works, you can find below the purpose of every color channel in every texture.
[MODEL]_Structline.dds :
The R channel contains structure lines.
The G channel contains the baked ambiant occlusion, also used for lighting.
The B channel contains the canon’s lightmaps, used to light them in a convincing way while shooting.
The A channel contains reflective zones i.e. metallic or glass looking parts. A 255 value means no reflection at all and a 0 value means a total one.
[MODEL]_Normal.dds
The normal map
[MODEL]_Damages.dds
Used when the plane is damaged.
The R channel contains the minor damages.
The G channel contains minor + major damages.
The B and A channels are currently unused.
NOTE: The [MODEL]_StructLines.dds is unique for all the skins of one plane. However it’s possible to surcharge it for a particular skin by creating a new one named as the skin with the _StructLines suffix.
For example, Bilby’s skin:
AI_PLANE_11_racer_metal.dds
has its own StructLines map:
AI_PLANE_11_racer_metal_StructLines.dds
This feature is also available for the normal map but is not currently for the damage map.
If you have bought and played BOMB Mk I or Mk II on Desura, then you may have experienced a crash during gameplay with the Mk III or in the options menu.
There are 2 ways to fix that issue:
Delete the file “[user]/documents/BOMB/config/input.cfg”. Doing this will reset the inputs to the “factory settings”.
You could also edit the file “[user]/documents/BOMB/config/input.cfg” and replace all occurrences of “65535” by “0”
This is it, the Mk III development has been completed. The release on Steam has been scheduled for august the first at 5pm PDT, ie 2am in western Europe.
The changelog
Added
The “fjord” environment.
The Act III and it’s six missions
A new playable aircraft, the KGP XVII Puffin, an heavy fighter/bomber, fast, well armed, but with a low maneuverability.
The Race multi-player mode, still in beta(there is a lot of game design to do on this one)
The server browser using SteamWorks. Therefore, if you only own the game on Desura, you won’t be able to use it.
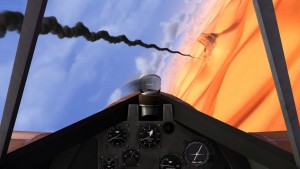
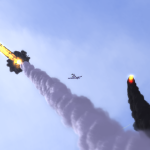
The internal guns now light the aircraft when fired. This may come in the future for external guns too.(there is a gif demonstrating the effect later on this page)
There is now collisions with the trees.
Enhancement
The behavior of aircrafts when grounded is much better than in the Mk II.
The AI has been improved and now reacts more smoothly and is less given to splash in water.
Turrets have been improved.
The shield effect has been improved.
You can now configure the dead zones for your gamepad/joystick analog axis.
The aircraft’s labels are now clearer when aircrafts are out of the screen.
The general sound mixing has been improved.
Bug Fixes
A lot of crashes and bugs have been resolved.
The netcode is more stable.
The new effect of the guns:
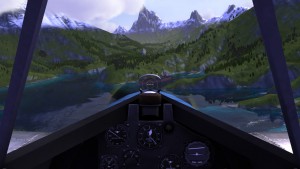
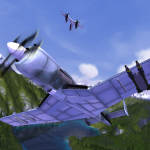
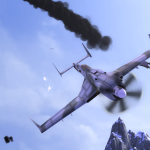
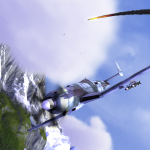
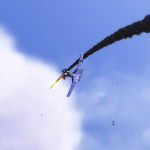
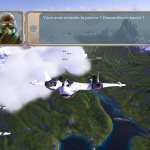
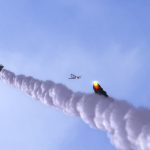
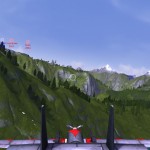
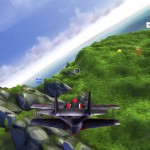
A bunch of screen shots from a mission of the third Act.
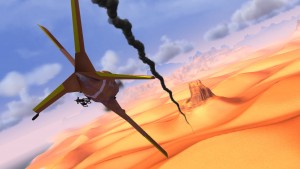
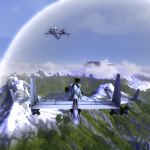
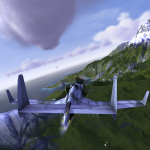
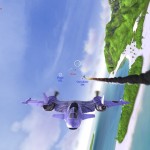
A few pics from one of the last multiplayer test with some friends:
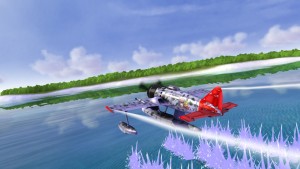
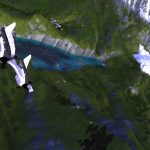
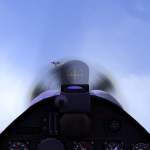
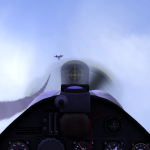
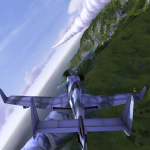
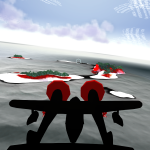
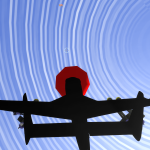
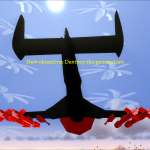
Finally, some pics of a nice bug due to an error in the texture conversion script to the .dds format.
The E.T are sending us a message !
Even being colourblind I can see there is a problem
Ça y est, la Mk III est finie. La sortie sur Steam est prévue pour vendredi 1er aout à 17h PDT, ce qui correspond plus ou moins à 2h du matin chez nous.
Le changelog
Ajouts
Environnement des fjords.
L’acte III au complet avec ses 6 missions.
Un nouvel avion jouable en multi-joueurs, le KGP XVII Macareux, un bombardier/avion d’attaque rapide, bien armé mais peu maniable.
Le mode course , toujours en bêta (il reste pas mal de game design à faire.)
Le server browser en utilisant SteamWorks. Par conséquent, si on ne possède le jeu que sur Desura, on ne pourra pas utiliser le server browser.
Les canons (internes) éclairent dorénavant l’avion lorsqu’ils tirent. Cela viendra peut être pour les canons externes.(voir gif plus bas)
Les arbres ont désormais des collisions.
Améliorations:
Le comportement des avions au sol a été grandement amélioré depuis la Mk II.
L’IA a encore été améliorée, elle a un pilotage plus souple et a moins tendance à se crasher dans l’eau.
Les tourelles ont été améliorées.
L’effet du bouclier a été modifié.
On peut désormais configurer les “dead zones” des axes de manettes/joystick.
Les étiquettes des avions sont plus lisibles lorsque les avions ne sont pas dans l’écran.
Une grosse passe a été faite sur le mixage des sons.
Bug Fixes
De nombreux crashs et bugs de scripts ont été résolus
Le code réseau est plus stable.
Le nouvel effet des canons:
Un paquet d’images d’une des missions de l’Acte III
Quelques images d’un des dernier tests multi faits avec quelques amis:
Et enfin, le résultat d’un bug du script conversion des textures en dds:
The E.T are sending us a message !
Even being colourblind I can see there is a problem