Disclaimer: This last part is the hardest one to understand at once as it involves a lot of scripting.
You can find the mission created following this tutorial in the game, under the name “Sample mission 3“. The complete script file can be found in :
[BOMB install folder]\Media\extmissions\Sample_mission_3\Scripts\
Now we have a mission with multiple objectives, asking the player to destroy both vehicles and aircraft. But this is still harsh. We’ll see in this tutorial how to add more staging to make the mission more interesting.
Explosions !
Open the mission you’ve created following the previous tutorial.
First, let’s imagine the mission is about destroying an howitzer that is bombing the airbase.
As the howitzers in BOMB are not actually firing anything, we need to add some fake explosions around the airfield.
To do so, there is a special object type called “Explosion Zone”, which is created by script.
To create it, simply add these lines at the end of the “onInit()” function
self.explosionZone =createExplosionZone()

self.explosionZone:setPosition(self.gameManager:getLevel():getObject("player_spawn"):getPosition())

self.explosionZone:setZoneSize(Vector3(500,0,500))

self.explosionZone:setFrequency(2)

self.explosionZone:setComposerType("P_GROUND_EXPLOSION")

self.explosionZone:setSound("SFX_EXPLOSION_")

self.explosionZone:start()
This will create an explosion zone, located around the player_spawn, with a size of 500 meters x 500 meters, making an explosion every 2 seconds.
The kind of particle effect used is “P_GROUND_EXPLOSION” and the sound set used is “SFX_EXPLOSION_“.
In the very first mission of the game “Spam”, we used this to create the flak explosions when approaching the village, but with different particles and sound:
self.explosionZone:setComposerType("P_FLAK_EXPLOSION")

self.explosionZone:setSound("SFX_FLAK_")
Imagine now you want to use this on water, IE if you want to make a mission featuring a ship attacked by an howitzer, then you could do this:
self.explosionZone:setComposerType("P_EXPLOSION_WATER")

self.explosionZone:setSound("SFX_EXPLOSION_")
Don’t worry for player safety though, the explosions created with ExplosionZones are harmless.

As the explosions are related to the howitzer, we need to disable them as soon as it is destroyed. Go back to the “onObjectDestroyed” function and change it’s content to :
function Sample_mission_3:onObjectDestroyed(object)

if(object:getName() == "howitzer_0") then

self.missionManager:getFlight("enemy_flight_0"):setFrozen(false)

 self.explosionZone:stop()

end

end
Now, the explosions will be disabled when howitzer is destroyed.
Adding dialogs
Things are getting better, but we still need to add some dialog to give more identity to the mission.
Go to the “onInit” function
Add this line at the end :
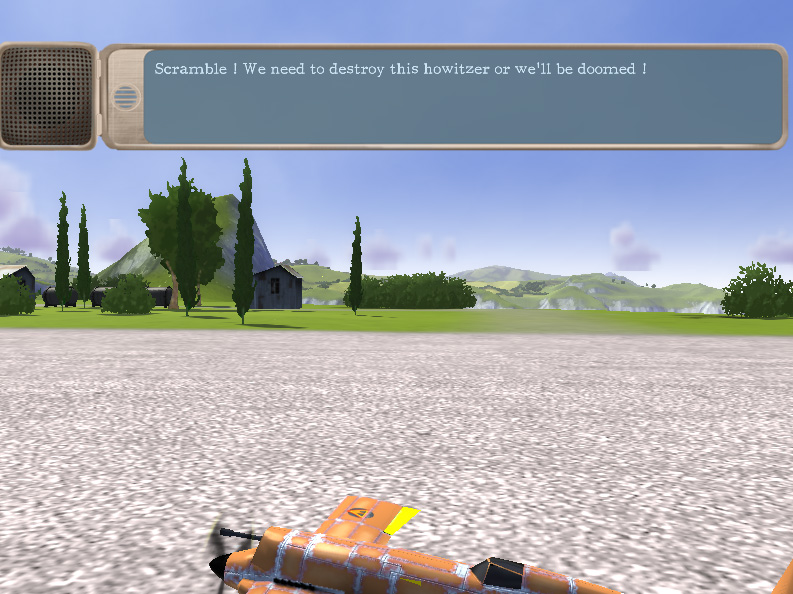
self.HUD:addRadioCommunication("unknown","","Scramble ! We need to destroy this howitzer or we'll be doomed !",nil)
The first parameter is the name of the character currently speaking. The second one is the “mood”, here left blank, the third parameter is the dialog itself, and the last one is the object the camera will look at (using a flyby camera if the object is moving) during this dialog.
If left to nil, the last parameter won’t change the camera at all, leaving it to the default in game camera.
There are multiple versions of this function
- The flyby :
addRadioCommunication("[character]","[mood]","[text]",object)
You can use nil as the object parameter to automatically look at the player aircraft during this dialog.
- The focus:
addRadioCommunication("[character]","[mood]","[text]",object1,object2)
This will change the camera so that it will look at the object 2 from the object1.
You can use nil as the first object to look automatically from the player aircraft. If both objects are set to nil, this will use the default in game camera.
- The point of view:
addRadioCommunication("[character]","[mood]","[text]",object, exterior, yawAngle, pitchAngle)
The object parameter is still the object we’d like to look at, but now, if the targeted object is an aircraft having a cockpit, you’ll have the choice to force the point of view to cockpit or external, by setting the “external” parameter to true or false.
The two last parameters are the angles (in degres ) from which we’ll look at the object.
Let’s use the second function in this mission.
Replace the line we’ve added before by this one:
self.HUD:addRadioCommunication("unknown","","Scramble ! We need to destroy this howitzer or we'll be doomed !",nil,self.gameManager:getLevel():getObject("howitzer_0"))
Now, the camera will look from the player aircraft to the howitzer position.
Also add this one to introduce the pilot we’re playing in this mission:
self.HUD:addRadioCommunication("PILOT2","","Consider it done !",nil)
You can find the list of usable characters and moods on this page.
Here is the result:
Then we need to add a dialog when enemy flight is awaken to warn the player about this new threat.
Go again to the “onObjectDestroyed” function, and change it to:
function Sample_mission_3:onObjectDestroyed(object)

if(object:getName() == "howitzer_0") then

self.missionManager:getFlight("enemy_flight_0"):setFrozen(false)

self.explosionZone:stop()

local leader = self.missionManager:getFlight("enemy_flight_0"):getLeaderAircraft()

 self.HUD:addRadioCommunication("PILOT1","","How allowed you to destroy our guns ? You'll pay for that !",nil,leader)

 self.HUD:addRadioCommunication("PILOT2","","How original...",nil)

end

end
This will introduce the enemies as they arrive in the arena.
Mission ending.
Once every vehicle and aircraft has been destroyed, we can consider the mission as completed, and we need to tell it to the player.
As you may have found it by yourself, we need to add some code in the “onObjectiveCompleted()” function.
Add the following lines to the function body:
if(self.playerInterceptObjective~= nil and id == self.playerInterceptObjective:getId()) then

self.HUD:showMissionSuccess(true)

GameMenuObject.missionSuccess = true

end
This will display the “objective completed” text and enable the “next” button in the in game menu (the one you can access by pressing escape)
Bonus: landing objective
Bonus: You can also add a final “Return To Base” objective for players who’d want to land at the mission end, and automatically quit the mission when successfully landing.
First, we need to add the RTBObjective. Change the last piece of code to this:
if(self.playerInterceptObjective~= nil and id == self.playerInterceptObjective:getId()) then

self.HUD:showMissionSuccess(true)

GameMenuObject.missionSuccess = true

self.RTBObjective = self.missionManager:addRTBObjective(1,self.gameManager:getLevel():getObject("player_spawn"))

 self.playerFlight:setObjective(self.RTBObjective)

end
The new lines create a RTB objective telling the player to land near the player_spawn (located here on the runway, but you could also create another waypoint object located close to the hangars) .
Now, we need to track the completion of this objective to start a fade out.
In the OnObjectiveCompleted function, add this block:
if(self.RTBObjective ~=nil and id == self.RTBObjective:getId()) thenThe highlighted line will ask the game to start a fade to black lasting 5 seconds
PostProcessManager.getSingleton():fadeOut(5, ColourValue(0,0,0,0))
self.endFadeStarted = true
self.endTimer = 0
end
The default script will automatically quit the level 5 seconds after the fade has been started. The piece of code doing this is located in the [MissionName]:update() function, you can have a look if you want to but it’s not necessary.
Et voilà !