It’s pretty easy for anyone to add their own skins for BOMB and here’s a tutorial detailing how to do it.
Notice: This tutorial is not made from an artistic point of view, but solely a technical how-to.
The list below links all the planes from the game to its a template containing a full texture set. The second name, the one with the link is the internal (in engine) name of the plane.
VB-42 Calamari : AI_PLANE_10
MM.3803 Bilby: AI_PLANE_11
CK50 Kani: AI_PLANE_12
KGP XVII Puffin: AI_PLANE_FB
VB-37 Astore: AI_PLANE_HF
S.N.A.F Rorqual: P_PLANE_B
King KAC-B: P_PLANE_F
S&E P.10 Libelle: AI_PLANE_1
Their respective folders are found in game_installation_directory/BOMB/Media/objets/aircrafts
Use your favorite image editor software (we are using GIMP here because it’s freely available for everyone, but basically any editor with layer and TGA support can get the job done).
Let’s start with a skin for the King KAC-B, which is the main plane in the game.
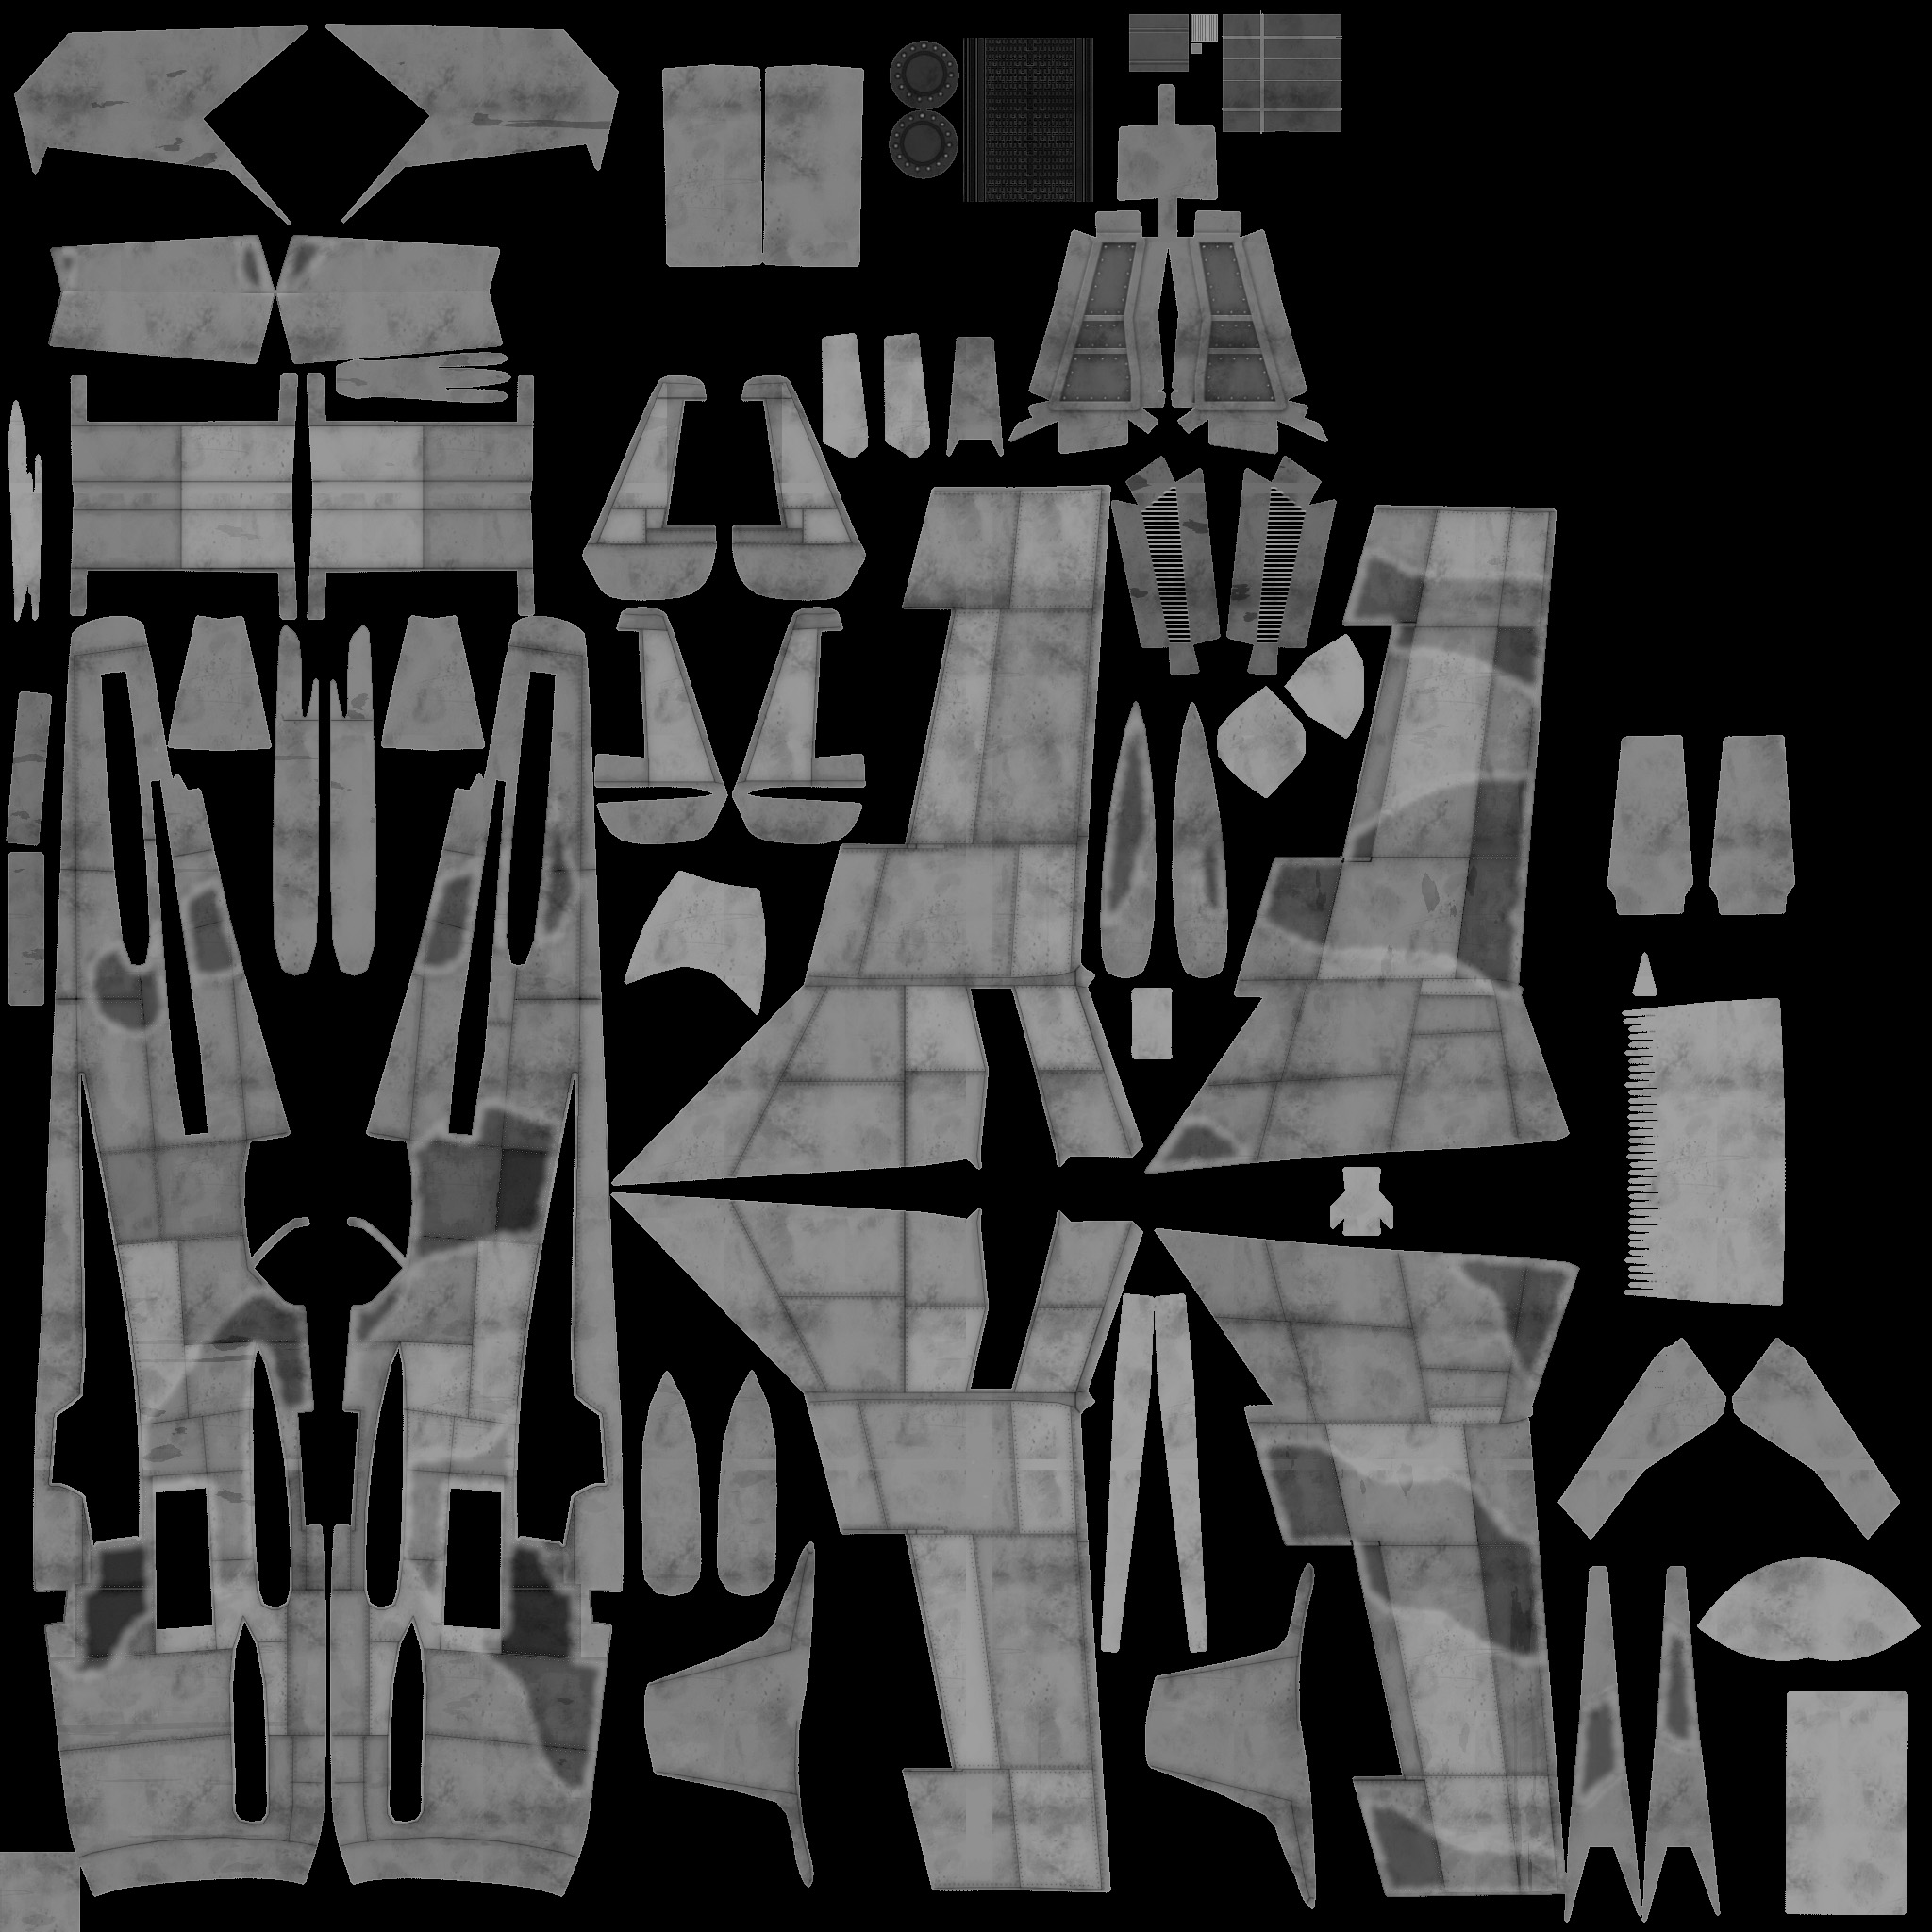
Download and extract the P_PLANE_F.7z archive anywhere you choose. It contains several TGA files, always organized as:
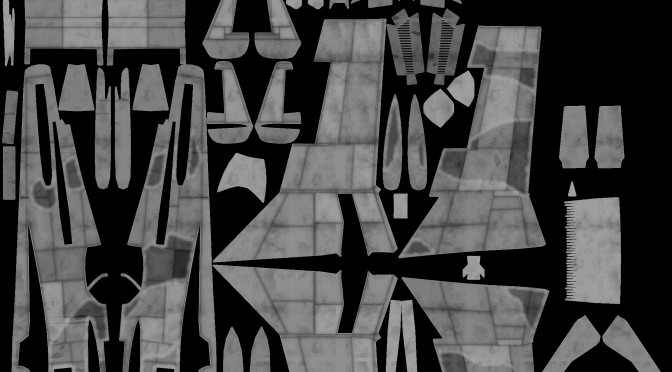
- mask.tga : a general mask showing the plane’s parts (for editing help purpose only, it’s not used in game)
- lines.tga : structure lines (the separations between parts)
- rivets.tga : plane’s rivets (you know… lots of them)
- structlines.tga: Not used directly for skin creation. We’ll speak more about that file later.
- internals.tga (optional): radiators, glass and landing gear parts.
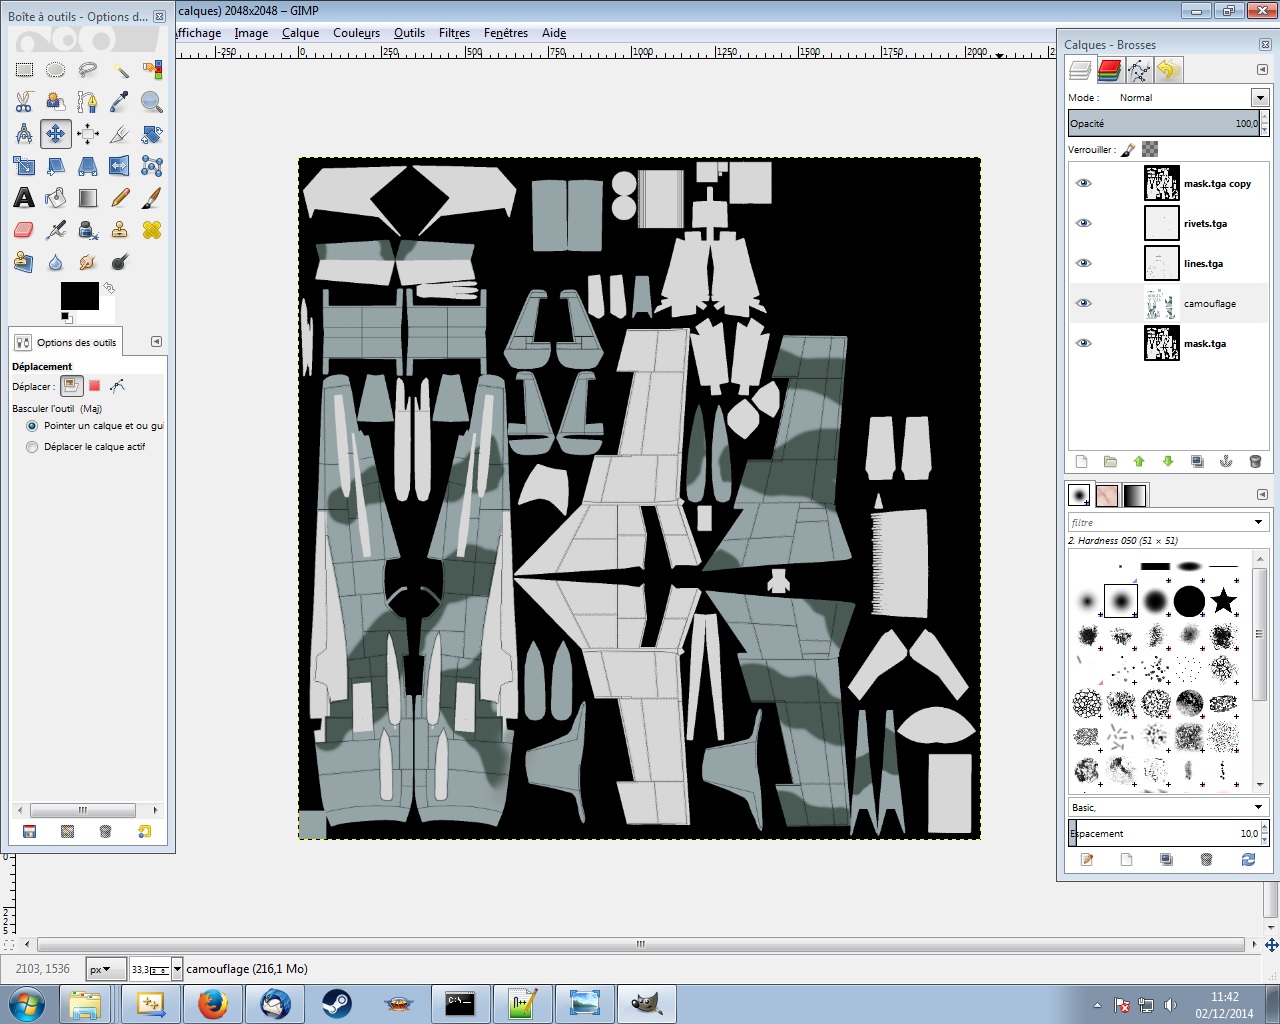
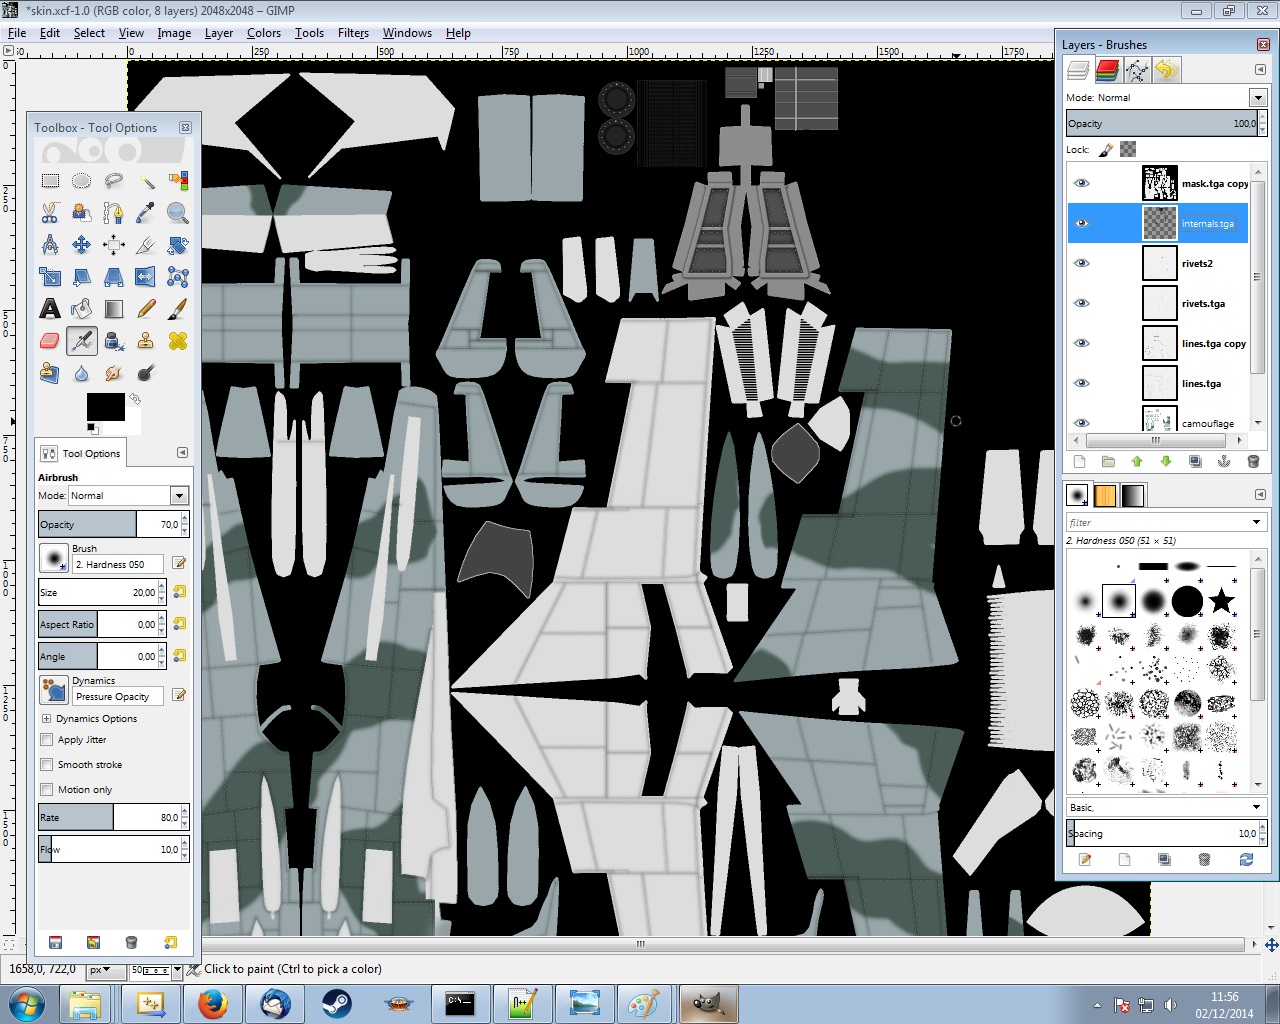
Open the mask.tga file and save it as a GIMP workspace file (.xcf extension).
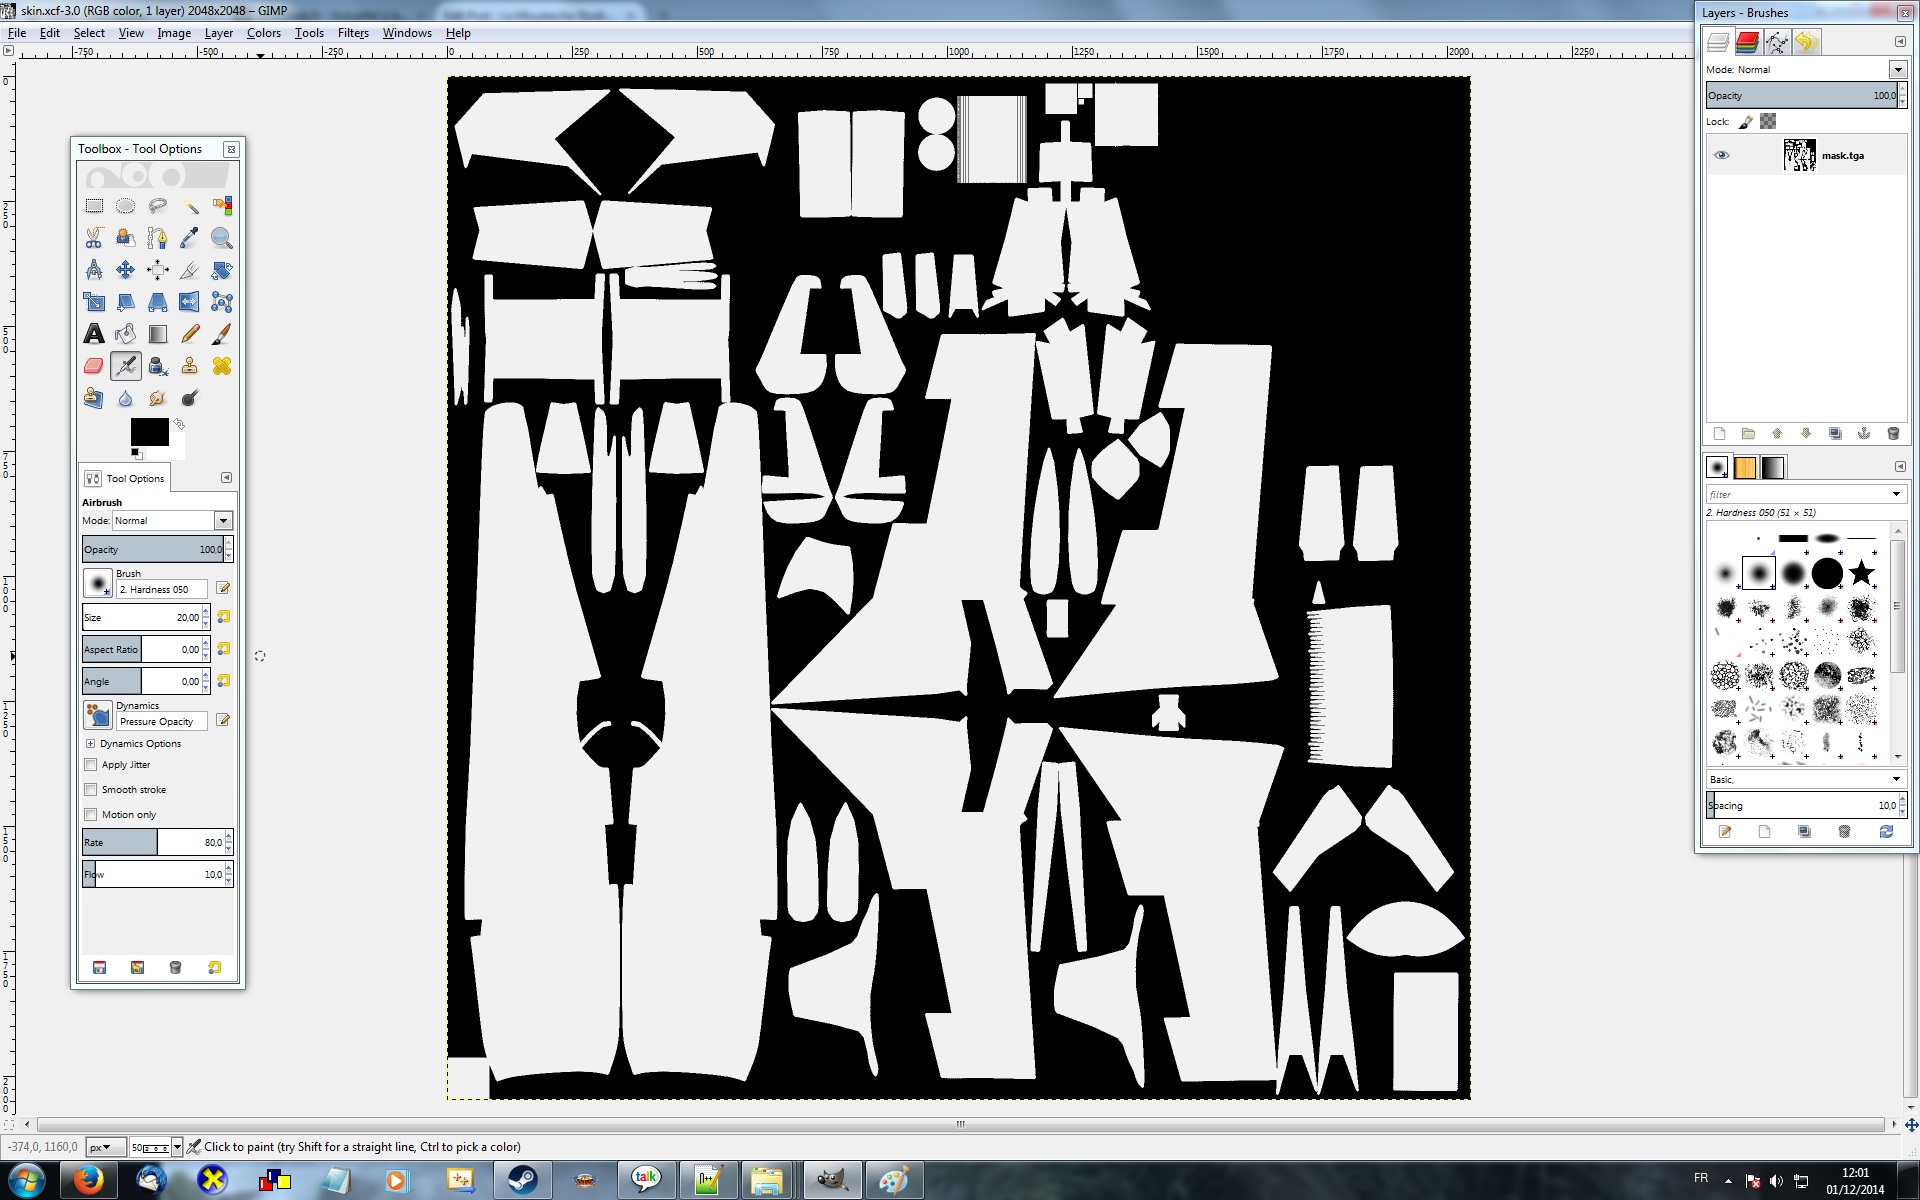
In this workspace, open lines.tga et rivets.tga as new layers (file > open as layer). For better display, set them in multiply mode:
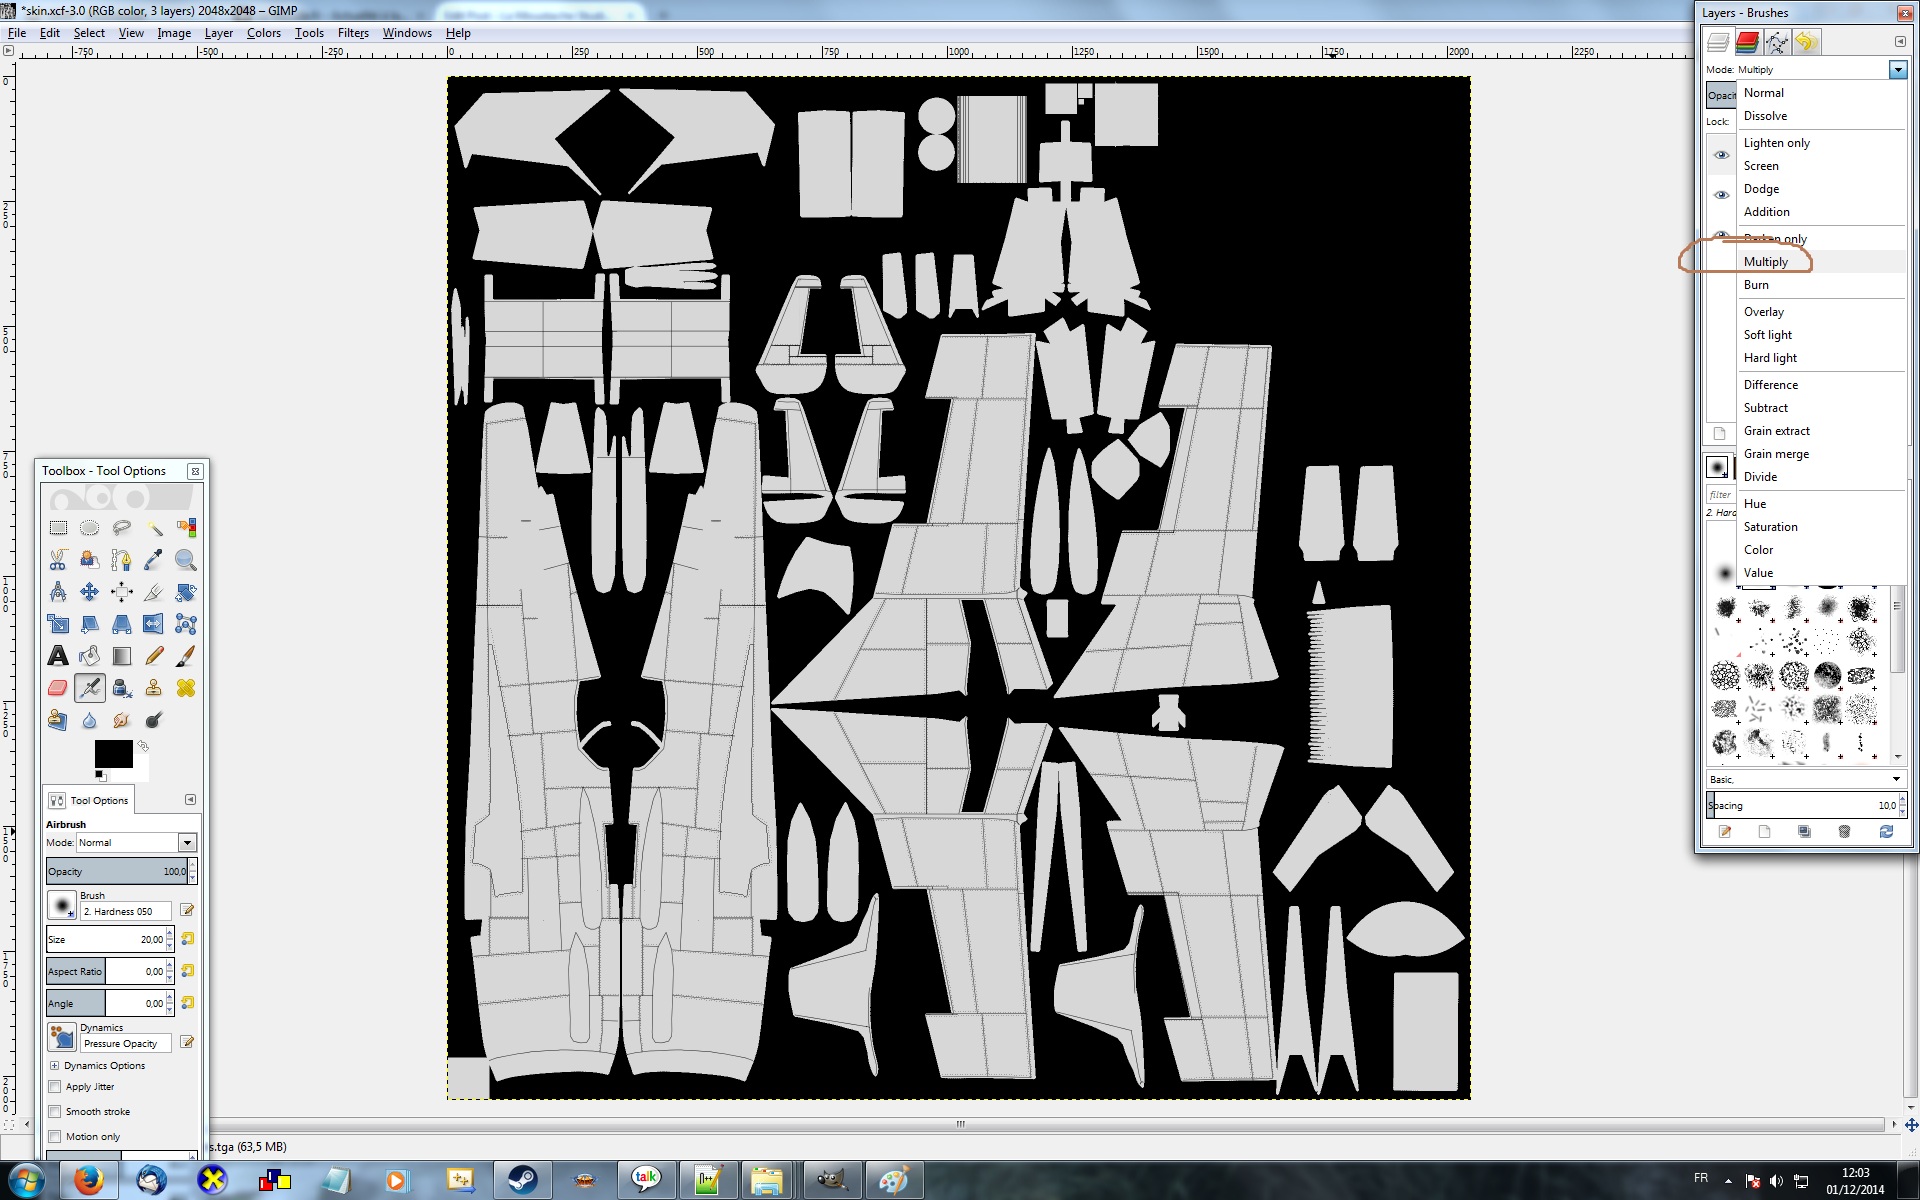
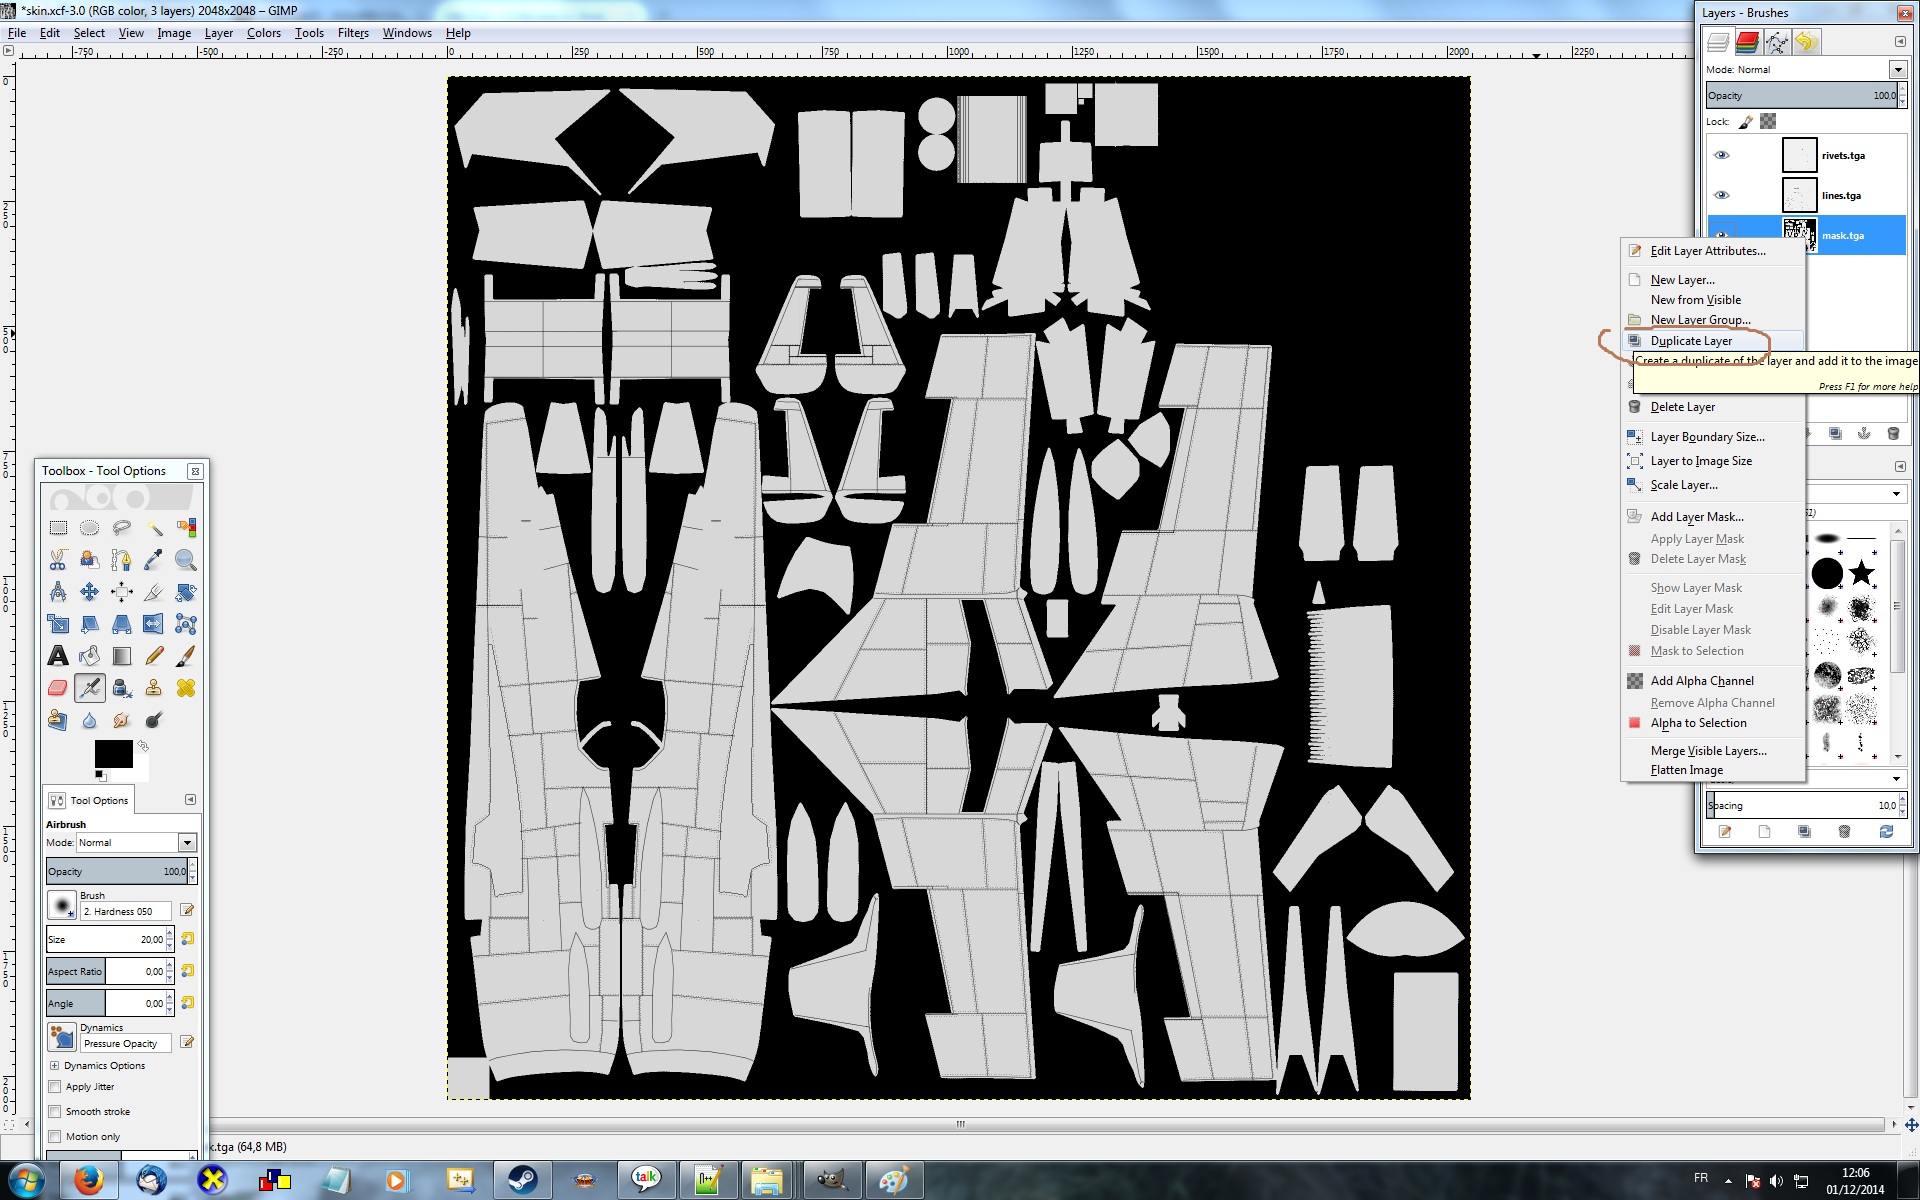
Duplicate the mask layer, put the new one on top of the stack and set it in multiply mode.
Just above the first layer, create a new one labeled as “camo”.
As I said, this tutorial is not for artistic purpose, so assume that I choose a few colors and paint my skin with them, leading to:
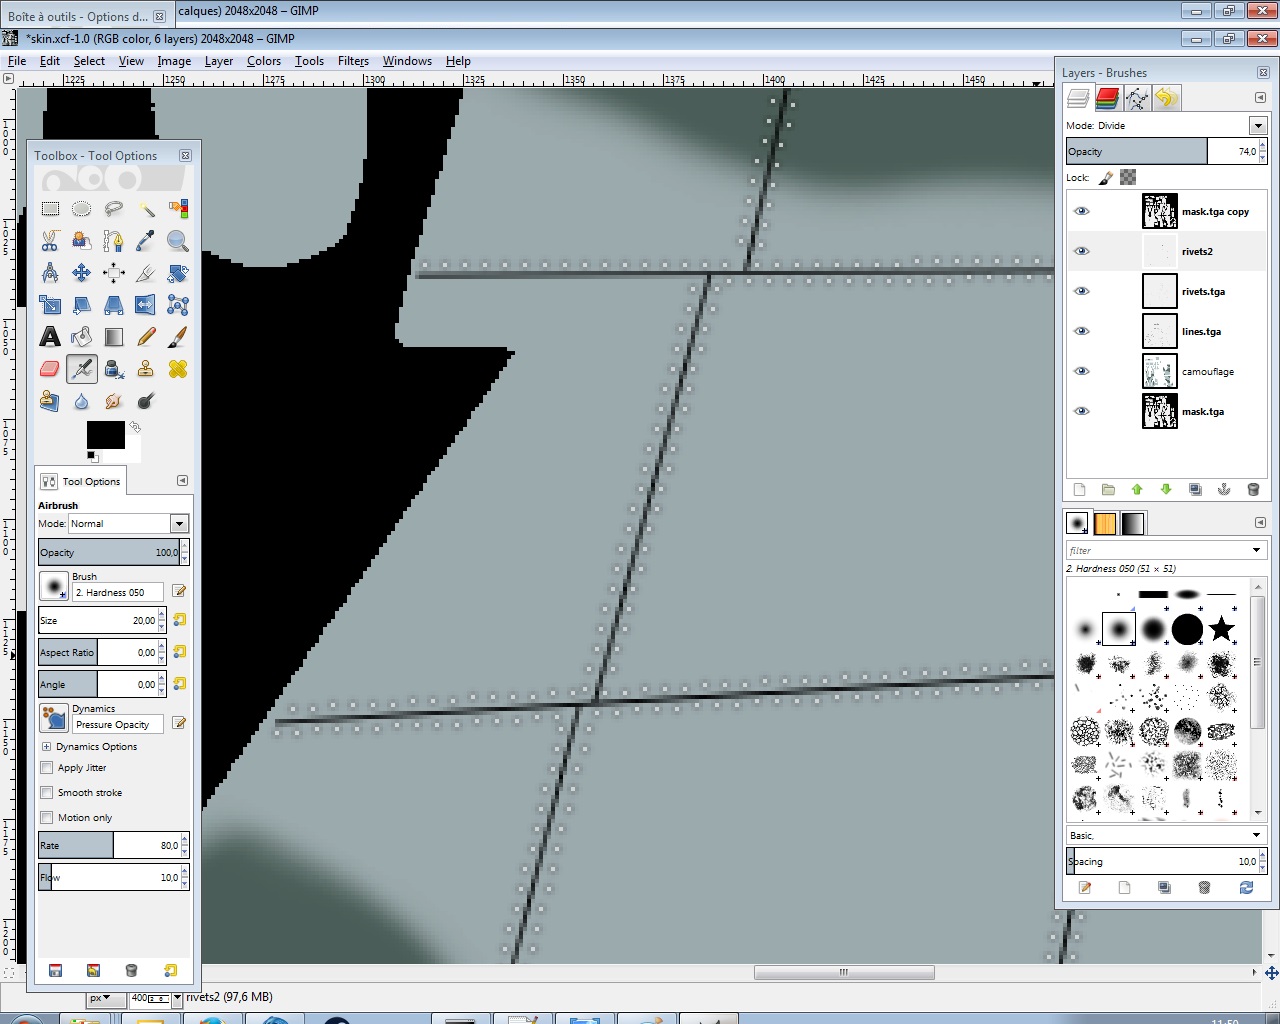
We can achieve quickly an used look.
- duplicate the rivets layer
- on the original one, apply a 2 pixels gaussian blur: filters > blur > gaussian blur
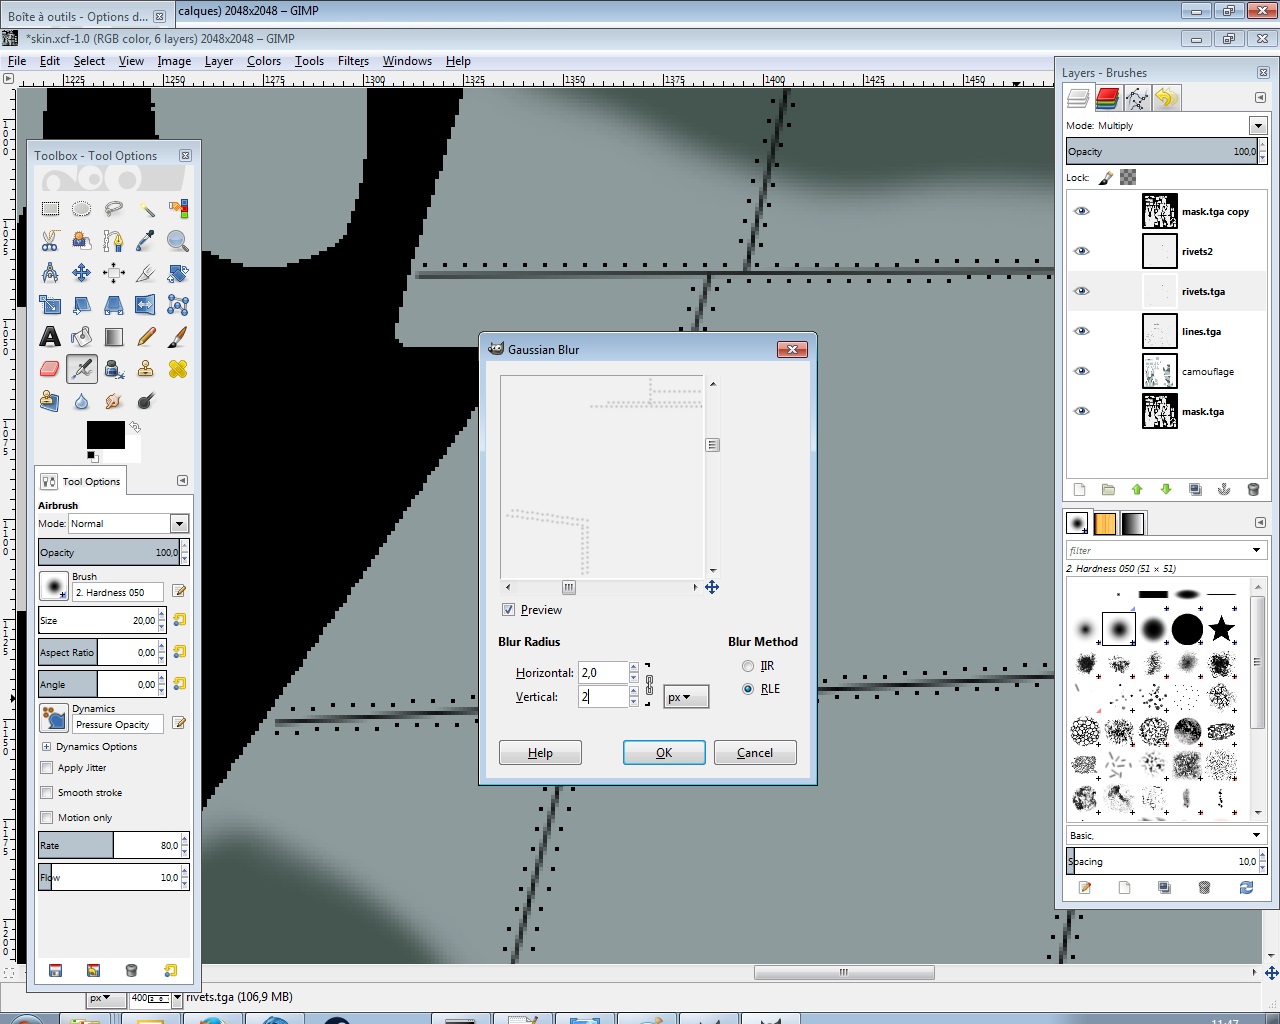
- set the duplicate one in divide mode with a 75% opacity:
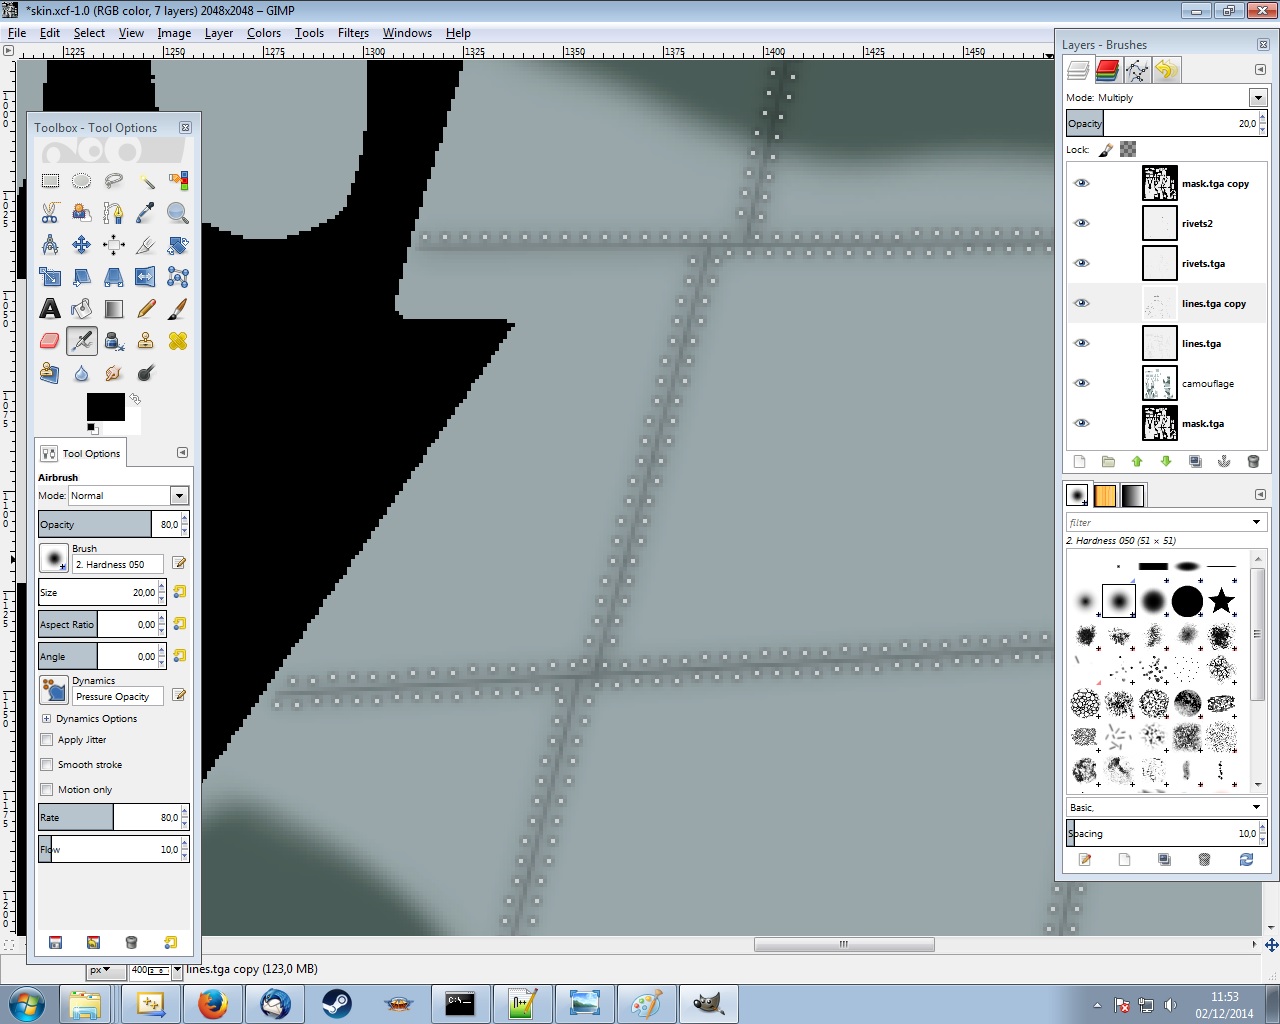
- duplicate the structure lines layer
- apply a 10 pixels gaussian blur on
- set the original one with a 20% opacity:
Open internals.tga as a new layer if it exists and move it on top of the stack:
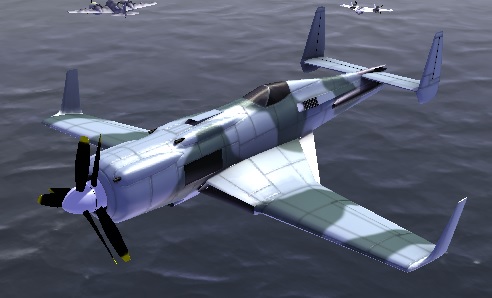
Voilà ! Our first skin is done.
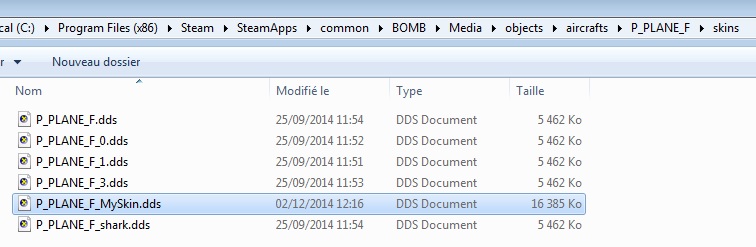
Now we need to export the image as a TGA file named P_PLANE_F_MySkin.tga, in 32 bit mode. It’s very important that the skin has an alpha layer because it contains a specular mask (i.e. light reflection mask). By default, setting this alpha layer to white or gray is sufficient, but to provide the best example, here’s what a worked out specular mask looks like:
Convert the TGA file in DDS file format with DXT5 compression using one of the many existing tools (e.g. a GIMP export plugin).
Even an online converter exists. In this one, choose DXT5 mode and click on generate mip maps.
Copy the dds file in BOMB/Media/objects/aircrafts/[MODEL]/skins, in our example it is: BOMB/Media/objects/aircrafts/P_PLANE_F/skins
Finally, launch viewer.exe, which is a minimal BOMB build to quickly start a skirmish. This program is located next to the BOMB main executable, in BOMB/bin/release.
You can switch between available skins by pressing the up and down keyboard keys.
To better understand how it works, you can find below the purpose of every color channel in every texture.
[MODEL]_Structline.dds :
- The R channel contains structure lines.
- The G channel contains the baked ambiant occlusion, also used for lighting.
- The B channel contains the canon’s lightmaps, used to light them in a convincing way while shooting.
- The A channel contains reflective zones i.e. metallic or glass looking parts. A 255 value means no reflection at all and a 0 value means a total one.
[MODEL]_Normal.dds
The normal map
[MODEL]_Damages.dds
Used when the plane is damaged.
- The R channel contains the minor damages.
- The G channel contains minor + major damages.
- The B and A channels are currently unused.
NOTE: The [MODEL]_StructLines.dds is unique for all the skins of one plane. However it’s possible to surcharge it for a particular skin by creating a new one named as the skin with the _StructLines suffix.
For example, Bilby’s skin:
AI_PLANE_11_racer_metal.dds
has its own StructLines map:
AI_PLANE_11_racer_metal_StructLines.dds
This feature is also available for the normal map but is not currently for the damage map.